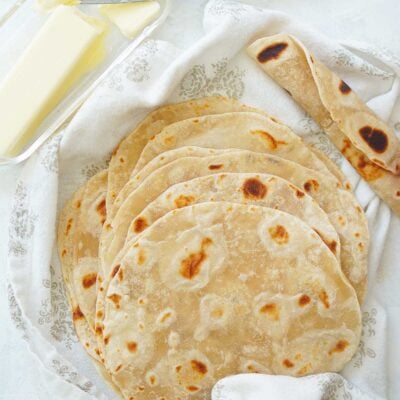
Homemade Flour Tortillas
These delicious Flour Tortillas are so easy to make at home, and they are a world apart from store-bought! They make a great addition to any Mexican meal.
Servings 12 Medium Tortillas
Calories 180kcal
Equipment
- Stand mixer or if kneading by hand: A large plastic bowl.
- Rolling Pin
- Comal, nonstick griddle or a nonstick large skillet.
Ingredients
Original Recipe
- 3 cups all-purpose flour tortillas (plus more to dust when rolling)
- 1 teaspoon table salt
- ½ cup vegetable shortening (plus more to coat the tortilla dough balls)
- 1 cup hot water
- 1 teaspoon baking powder, optional
Updated Recipe (this is the most accurate recipe. However, you'll need a kitchen scale to make the most perfect tortillas ever!)
- 500 grams all-purpose flour (plus more to dust when rolling)
- ¾ tablespoon table salt
- 100 grams Vegetable shortening in butter flavor (spreadable)
- 1 cups hot water
- 1 tablespoon vegetable oil to coat the tortilla dough balls
Instructions
KNEADING BY HAND:
- In a very large bowl, whisk the flour, salt & baking powder.
- Add the vegetable shortening/butter and incorporate well until it's all blended and crumbly.
- Add the hot water little by little and mix with your hands. Knead for 8 to 10 minutes until dough is smooth and elastic. The longer you knead the masa it will release the gluten allowing for a light fluffy tortilla.
- Dough should not be sticky to the touch. If it's sticky then add ½ teaspoon of flour at the time until it's no longer sticky. Don't add too much since this could make your tortillas hard later on.
KNEADING WITH A STAND MIXER:
- In the bowl of a stand mixer and the whisk attachment in place, add the flour, salt & baking powder. Whisk until well incorporated.
- Add the shortening/butter or lard and mix well until crumbly. Scrape the sides with a spatula to incorporate all flour as you go along.
- Change to the dough hook and turn to speed 2. Start adding the hot water little by little (about ¼ cup at the time).
- Mix until dough clings to hook and cleans side of bowl. Knead on speed 2 for 2 minutes longer, or until dough is smooth and elastic.
- Dough should not be sticky to the touch. If it's sticky then add ½ teaspoon of flour at the time until it's no longer sticky. Don't add too much since this could make your tortillas hard later on.
REST TIME
- Place the dough in a large bowl and cover with a damp towel and let rest for 15 to 20 minutes.
PREPARE COOKING THE EQUIPMENT
- Heat the comal/skillet until very hot on medium high heat, then lower to medium heat before you start cooking the first tortilla.
ROLLING TECHNIQUE
- Sprinkle a little flour on a clean surface such as your kitchen counter.
- Grab a handful (a little larger than a golf ball) of the dough and set the rest of the dough aside still covered with the towel.
- Spread the dough ball with a rolling pin, from the center outwards without reaching the ends. Rotate the dough to give a round and thin shape.
- As you roll the tortilla turn the tortilla to the fat edge and roll. Keep turning the tortilla and rolling the fat edge.
COOK THE TORTILLAS
- Before you begin, make sure the comal/skillet is hot. It's ready for the tortillas when you see steam coming out of it.
- Carefully, add the tortilla and cook until it starts to bubble on the edges, about 30 seconds.
- Using your fingers or a spatula, flip it. When it start to bubble, start turning then turn it around with a with a paper towel like if you were playing a music disk (watch video on mark ) . This way the tortilla cooks evenly since sometimes the comal is not heated evenly. Cook on this side about 50 seconds.
- Flip it once again. This is the last turn and it's when you'll get those big bubbles. Do not poke them! Cook for about 50 seconds.
- Remove from the comal immediately and transfer to a tortillera or a clean kitchen towel and cover.
Video
Notes
- Now that I'm in Portugal, I use Planta in butter flavor (sabor a manteiga).
- Heat: The comal is ready to cook the tortillas when you see steam coming out of it.
- Use a dish towel that has been washed without any strong soaps and does not have fabric softener. Often these smells will transfer to the tortilla! Or you can also line the dish towel with paper towels inside to act as a barrier (I do this regardless!)
- Refrigerate – Place them in a ziplock bag and store in refrigerator up to 3 weeks.
- Freeze – I really doubt you’ll have leftovers, but if you do you can store them in the freezer for up to three months. Freeze in an airtight in a ziplock bag. When ready to use, take out and let them thaw in the refrigerator.
Nutrition
Serving: 1 tortilla | Calories: 180kcal | Carbohydrates: 22g | Protein: 3g | Fat: 9g | Saturated Fat: 2g | Polyunsaturated Fat: 4g | Monounsaturated Fat: 2g | Sodium: 22mg | Fiber: 1g