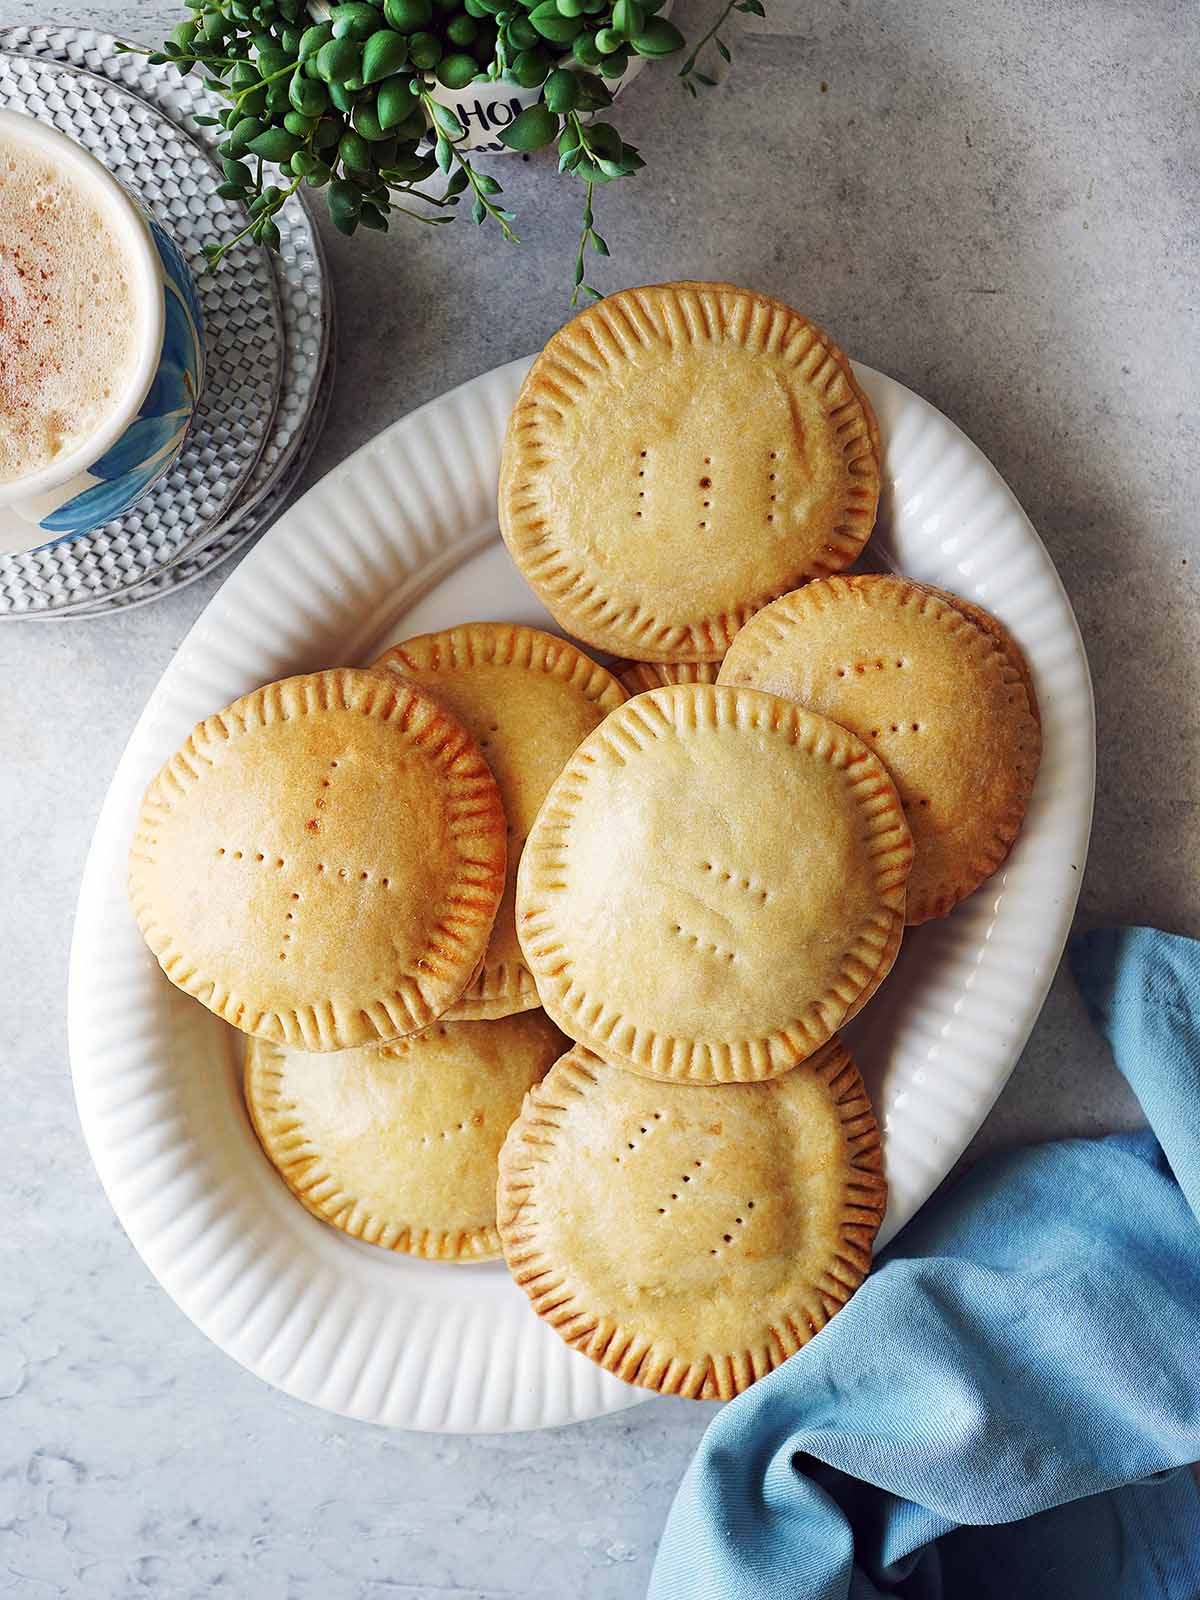
Coyotas are a traditional dessert from Hermosillo, Sonora. Made from wheat flour, vegetable shortening, sugar, milk (or a beer!) and the traditional filling is piloncillo.
🗒️ In This Post
Coyotas and Coricos are Sonora’s traditional desserts and usually they’re part of gathering or a gift basket. Specially for Sonorenses that live abroad! I’m always happy when my family brings me coyotas when they visit me.
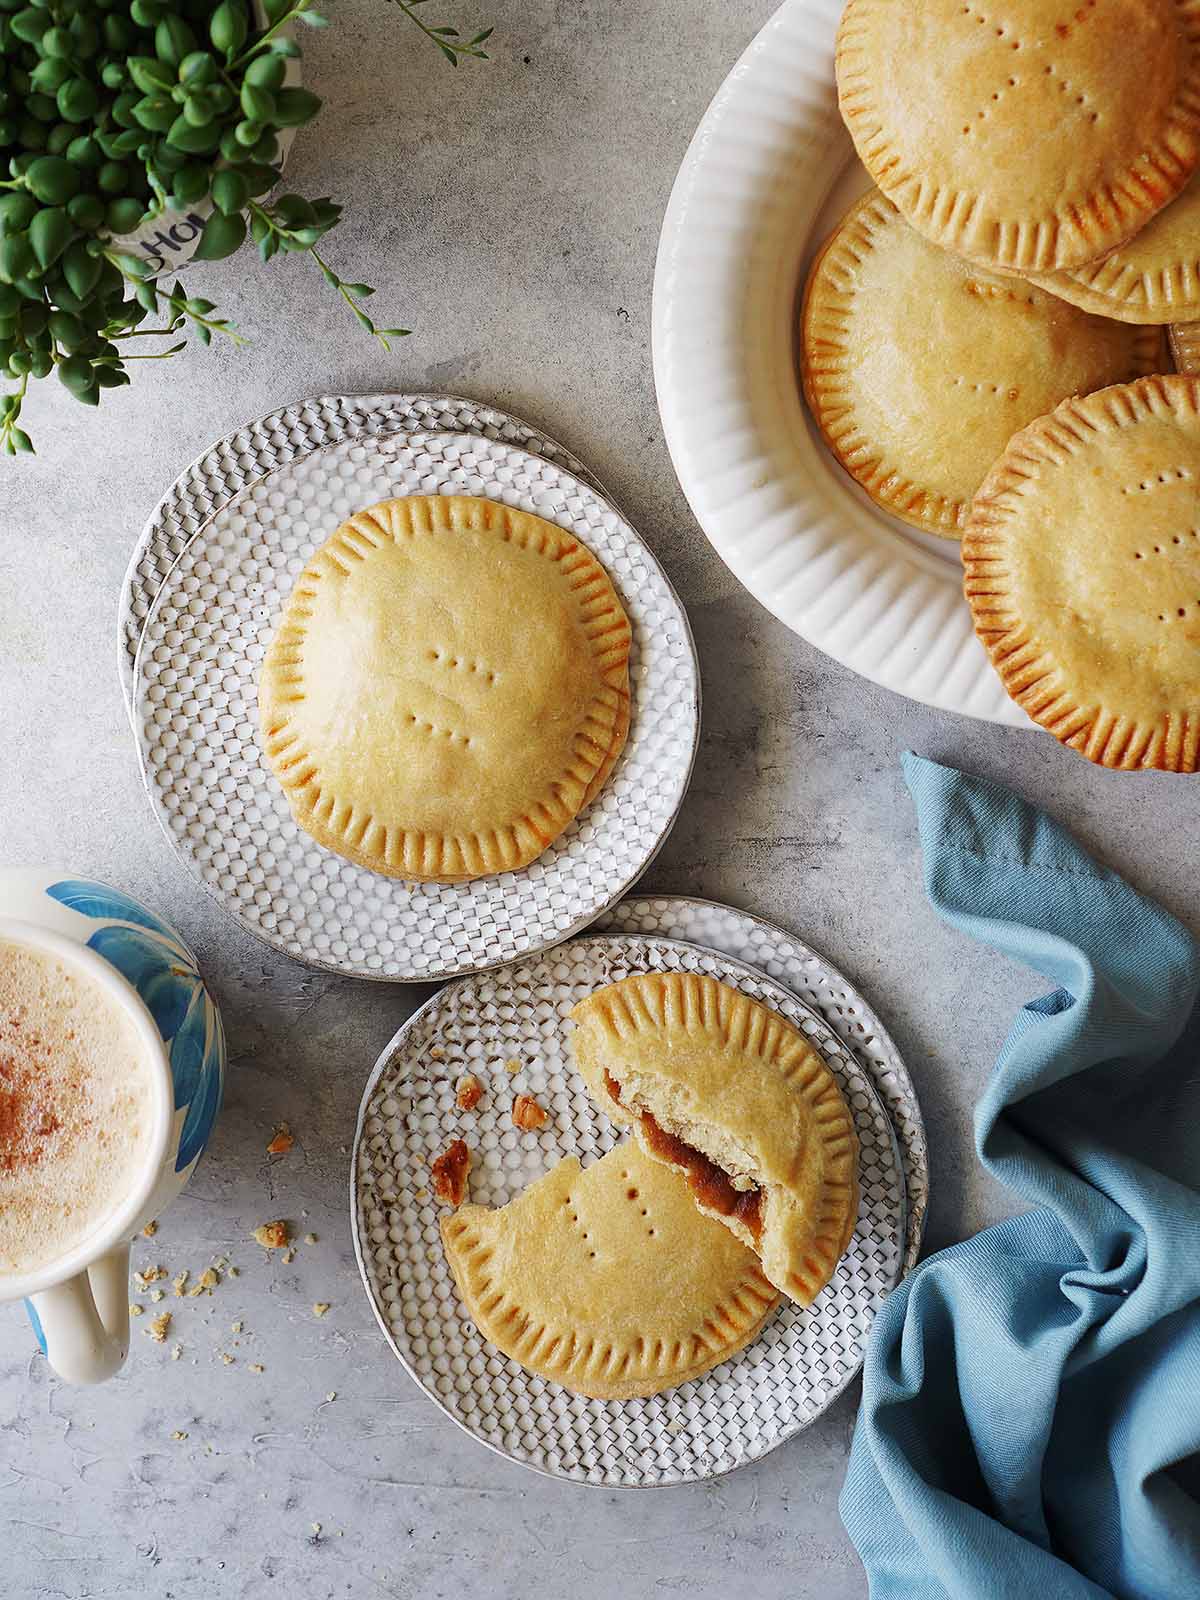
The typical size is around 20 cm in diameter so perfect to enjoy by yourself but also to share with someone else if you feel generous :). Originally they were filled with piloncillo, but today they are made with cajeta, jamoncillo, and combinations such as cajeta with walnuts or peanuts, etc. They are eaten as a dessert after heating them a little on the griddle. Accompanied by a cup of good coffee, they are an excellent way to end a good meal.
Why this recipe works
If you’re looking for a Mexican dessert that is easy to whip up, but can also impress family and friends, these Coyotas may just be your answer.
With just a few simple ingredients, and NO FRYER needed, you can have the comfort of a hand help pie, with the convenience of a cookie! And there won’t be any left just lying around because they will be gobbled up quickly!
Last year I made a homemade Sweet Empanadas recipe, and it’s quickly become one of my most popular recipes on the blog! The mouthwatering crust is incredible!
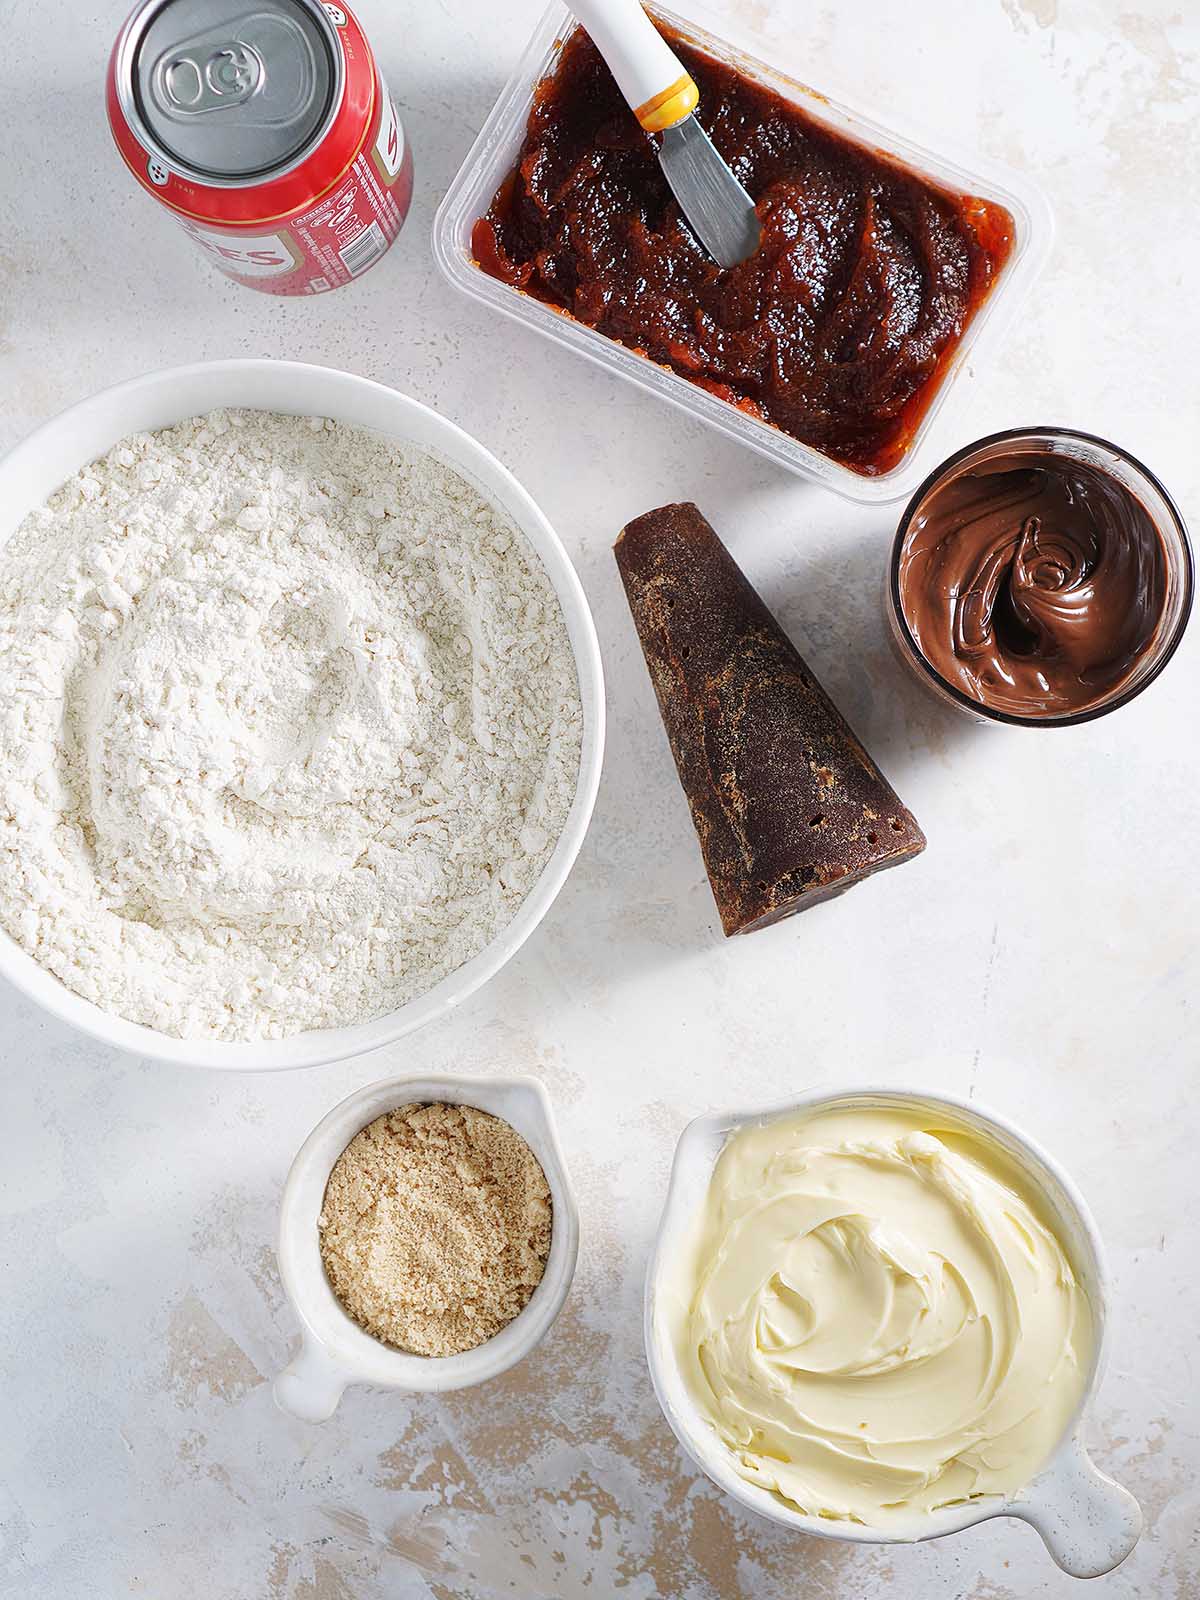
Today’s recipe uses an easy filling made of piloncillo and flour. Also made some with quince paste (dulce de membrillo), and nutella. Because I just love nutella!
Ingredients
- Vegetable shortening, lard, unsalted butter or margarine
- Dark brown sugar and table salt
- All purpose flour (500g)
- Beer (make sure it’s not light). Beer contains both yeast and flavorful compounds that can enhance the taste and texture of your baked goods.
Filling
- Piloncillo cones mixed with all purpose flour – also known as panela or Mexican brown sugar. Optional: add cinnamon for extra spice.
- Other optional fillings: Cajeta, Dulce de Leche, Quince paste (Dulce de membrillo), Nutella, Caramel, etc.
How to Make a Coyotas
This is a visual overview of the steps to make this recipe. See the detailed list of ingredients & instructions in the recipe card below.
Tools You’ll Need
- A greater (Optional) for grating piloncillo.
- A baking sheet
- Parchment paper
- A tortilla press or rolling pin
- Fork
- Pastry brush
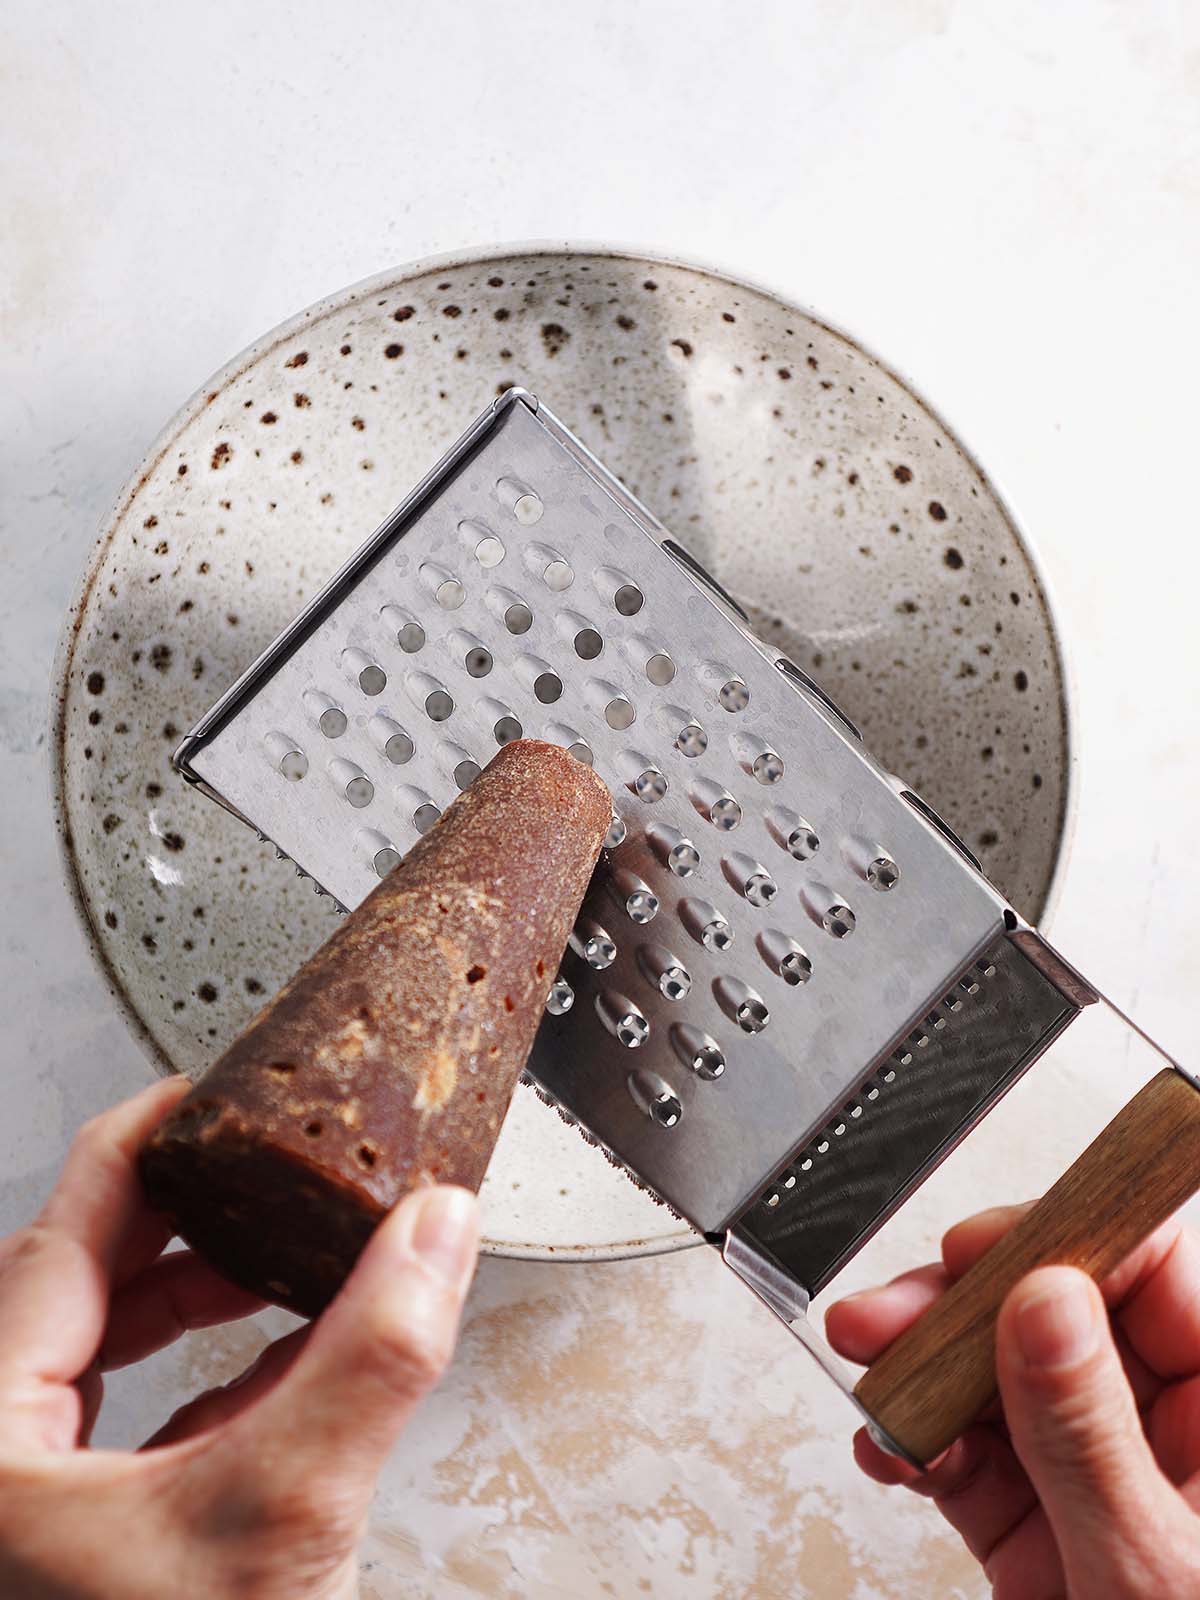
- Start by prepping the piloncillo and other fillings. Unwrap the piloncillo and grate it to break it into little chunks. Note: If the piloncillo is too hard, warm it up in the microwave for about 10 seconds to soften it up.
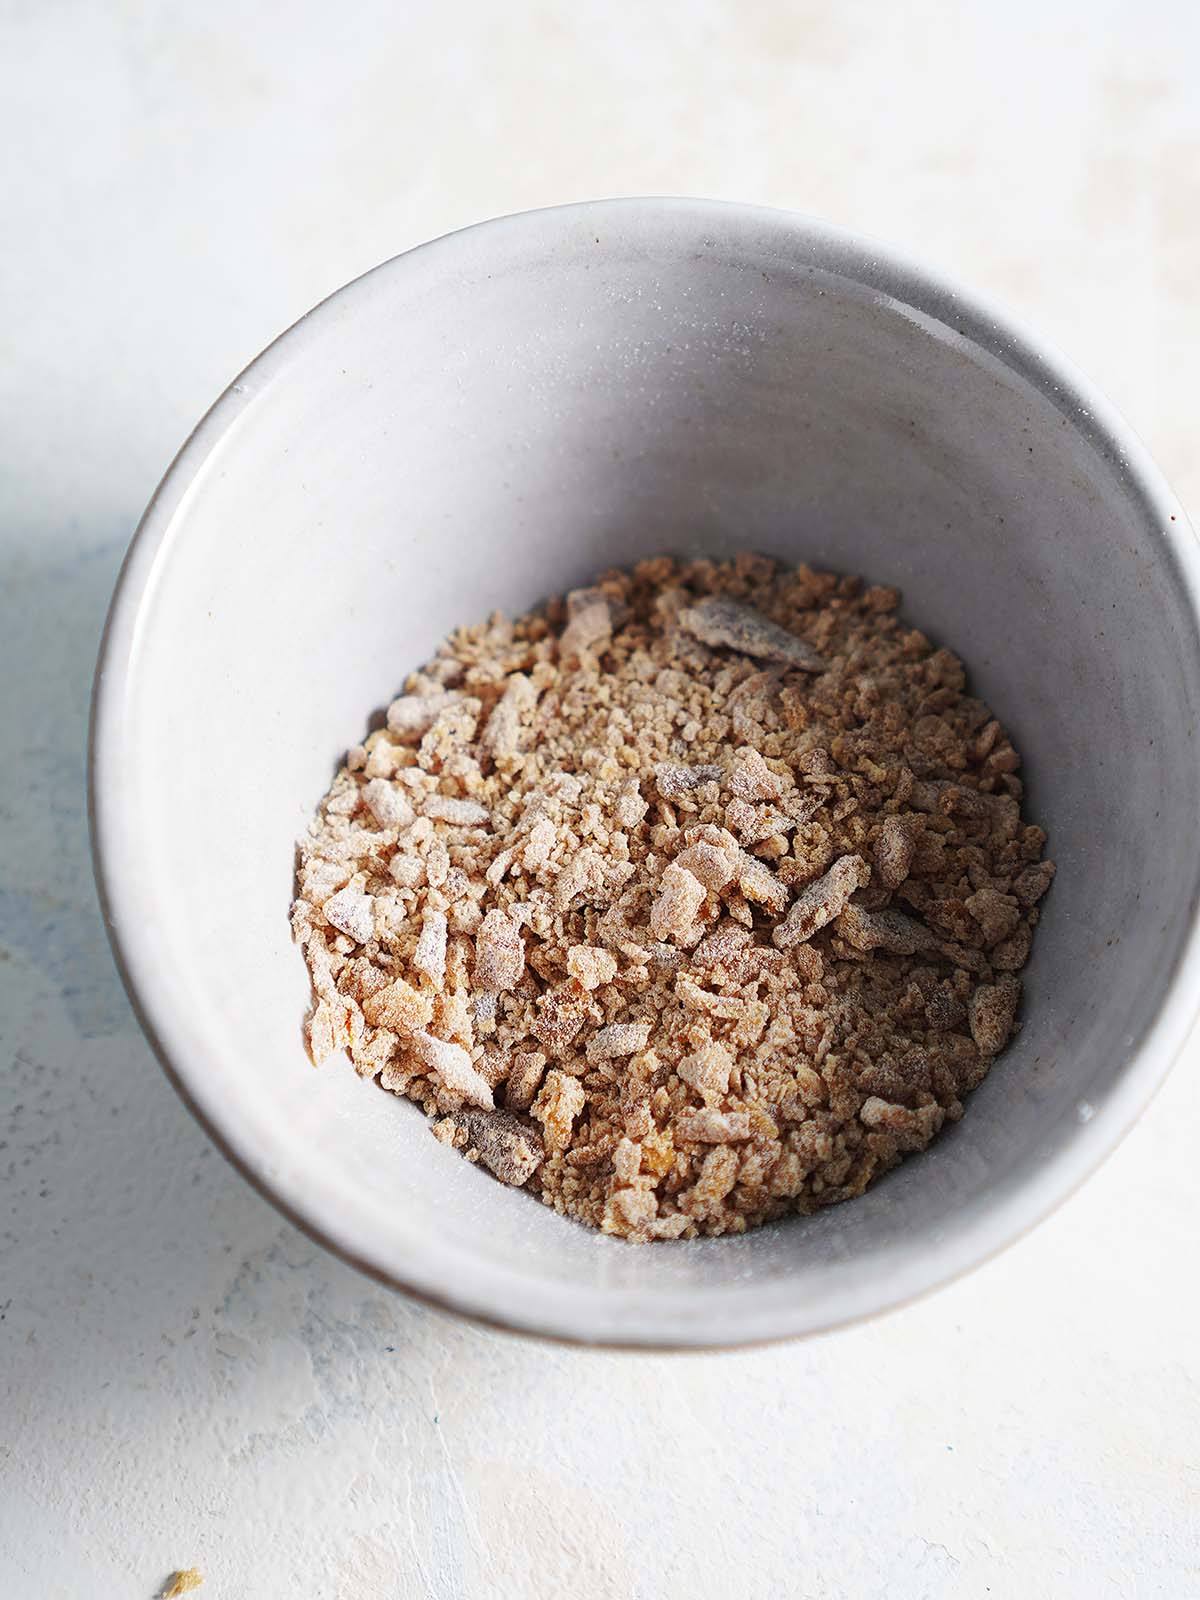
- Mix it with the flour and set aside.
- In a large bowl, cream the vegetable shortening or margarine with an electric mixer on medium to low speed or by hand. When it starts to get soft, add the sugar and salt and continue mixing for about a minute.
- Add the flour and mix until the mixture resembles coarse crumbs. Add the beer to the mixture while continuously kneading the dough until it becomes smooth and elastic.
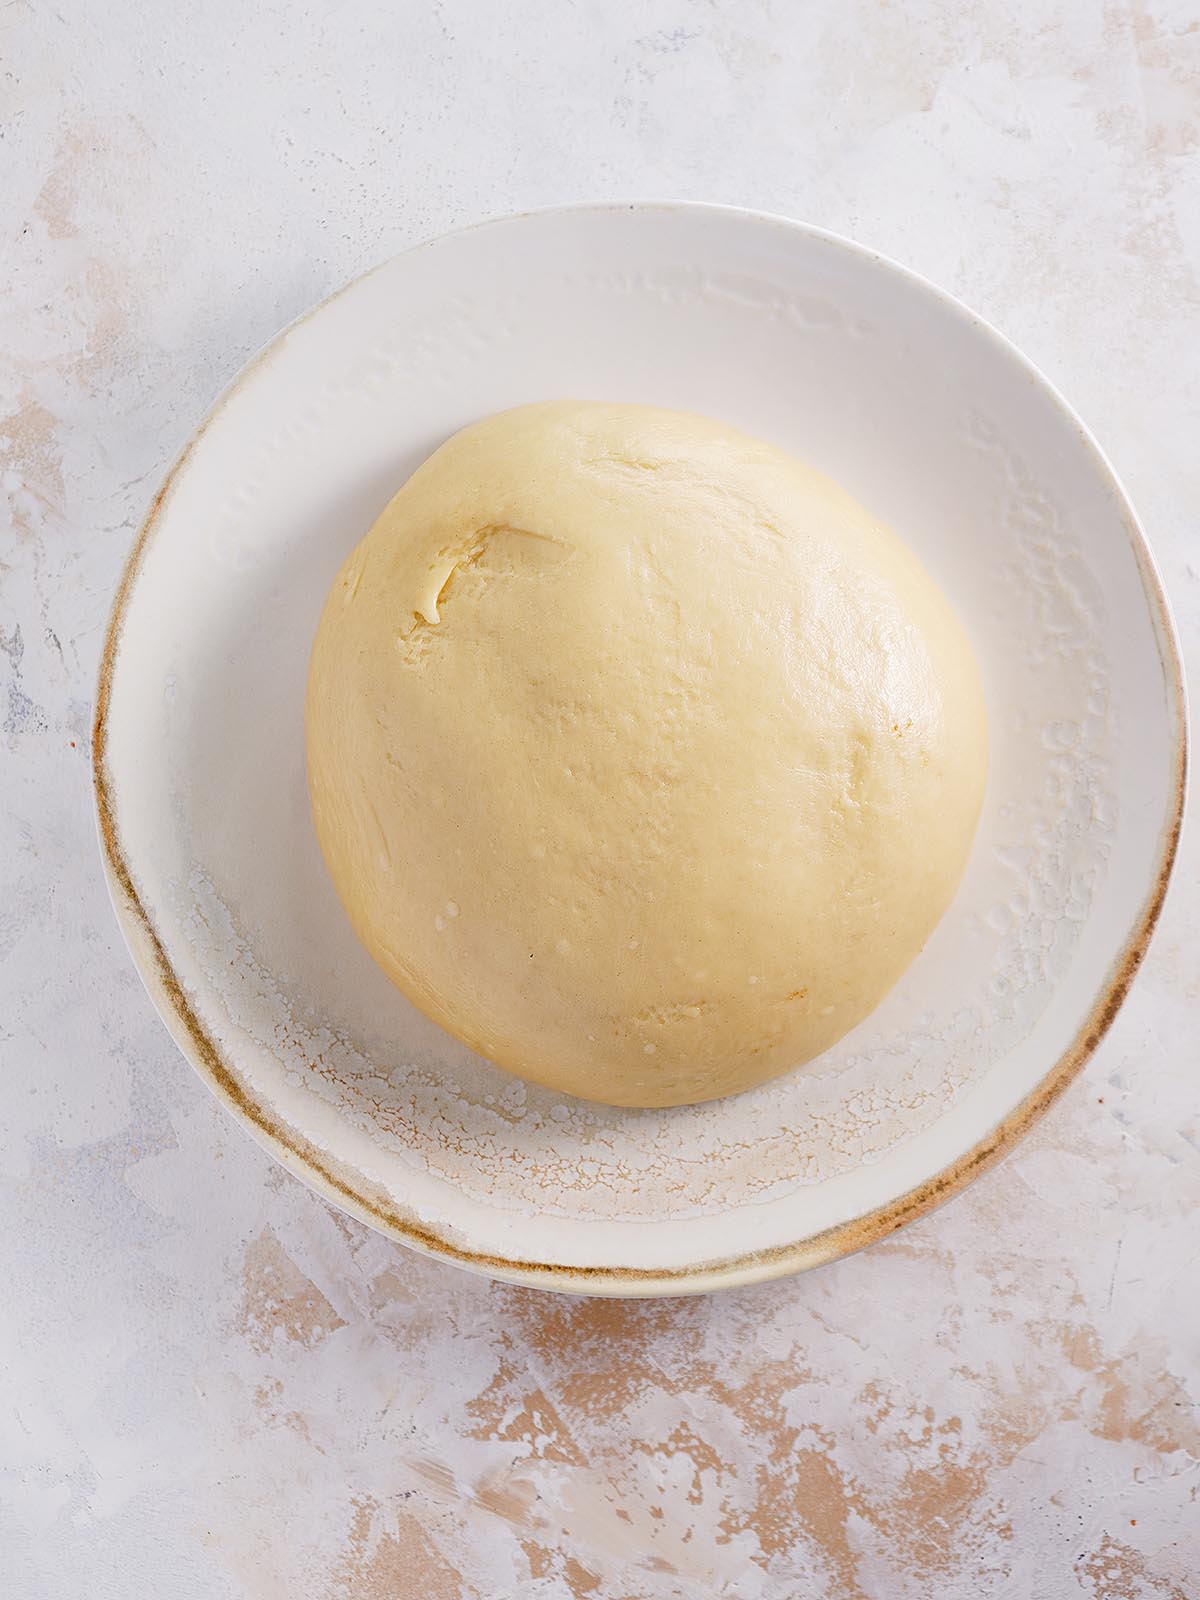
- Transfer the dough onto a clean surface and knead it gently for a minute until it becomes smooth and cohesive.
- Shape the dough into into small balls (about 40 grams, the size of a golf ball), place the dough rounds on a plate and wrap in plastic wrap, let rest for 20 to 30 minutes.
- Preheat oven at 350 F or 180 C. and line a baking sheet with parchment paper.
Making the disks
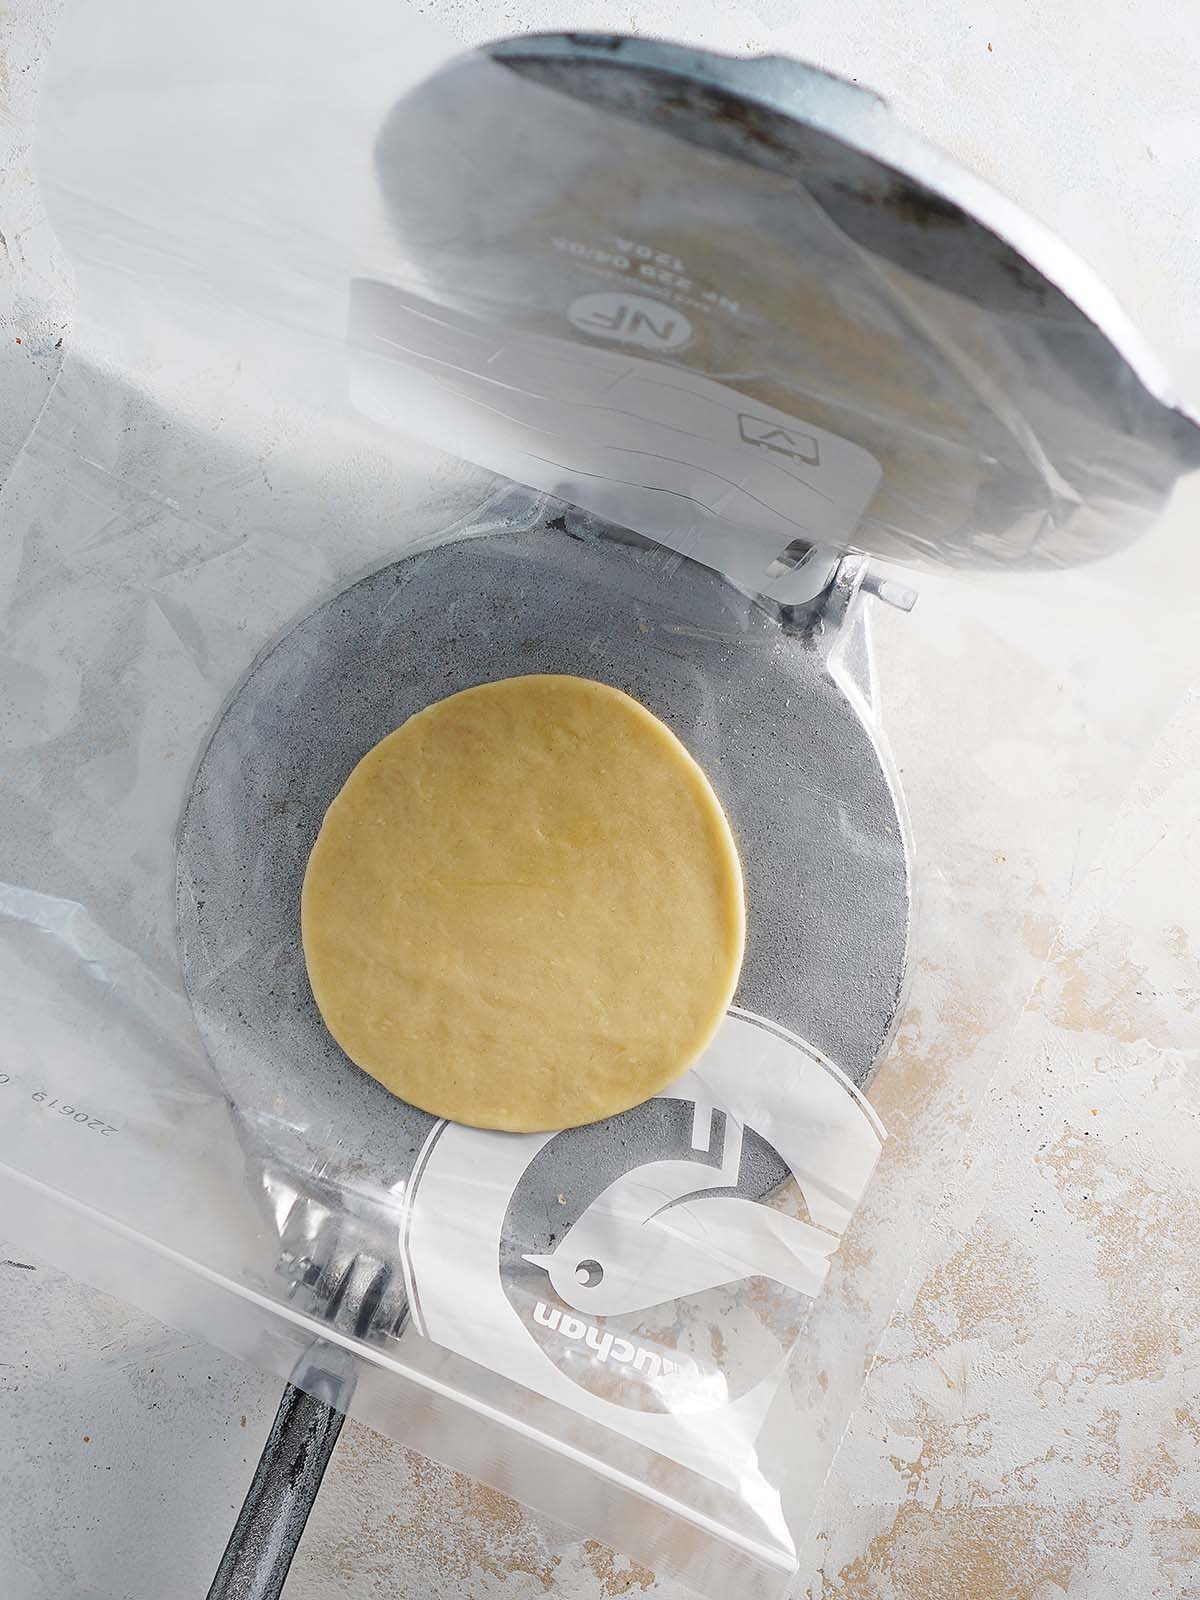
- With tortilla press: Place the dough ball between two pieces of plastic in a tortilla press (I use a ziplock bag, with the sides cut open) Then gently press the dough ball until it forms a 4-6 inch disk. Repeat until all balls are pressed.
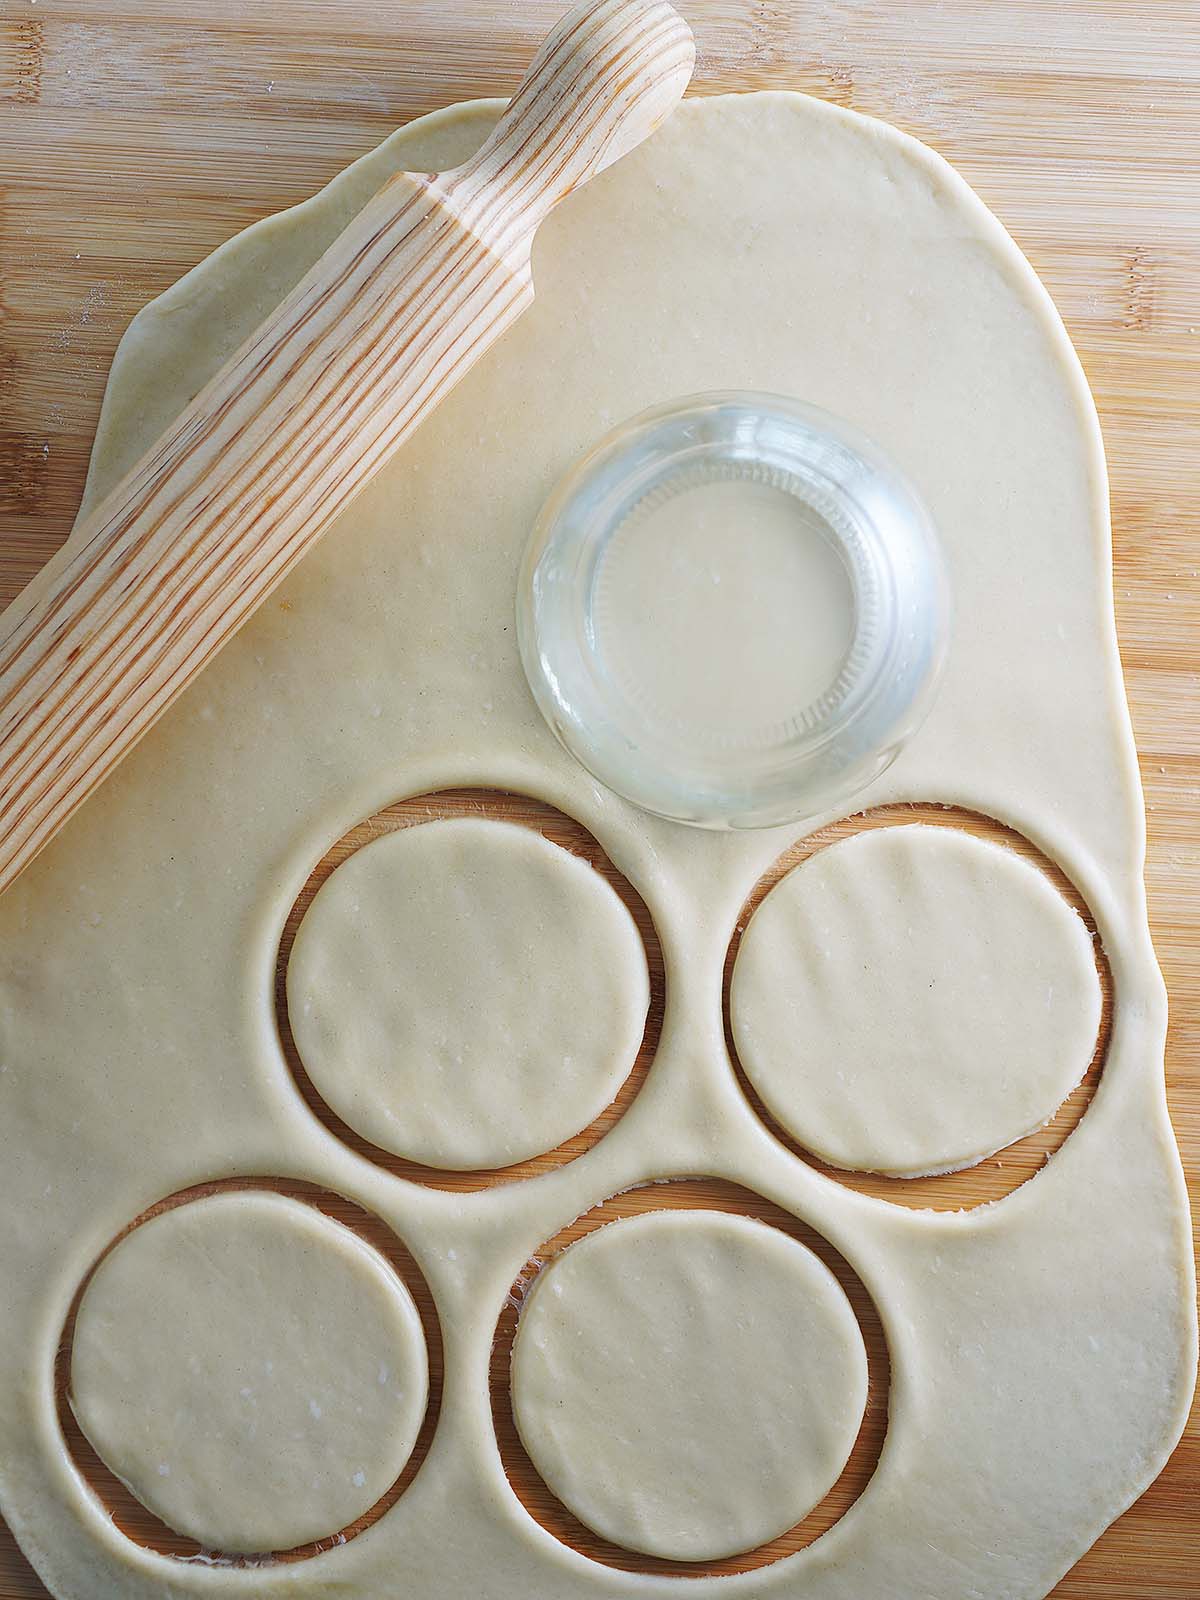
Rolling dough by hand: Divide into 4 equal portions. Roll out dough onto lightly floured surface to about ¼ to ⅛ -inch thickness. Using a cookie cutter or a cup, cut out circles of dough about 4-6 inches in diameter. Gently lay the disks onto the prepared baking sheets.
Assembling & Baking
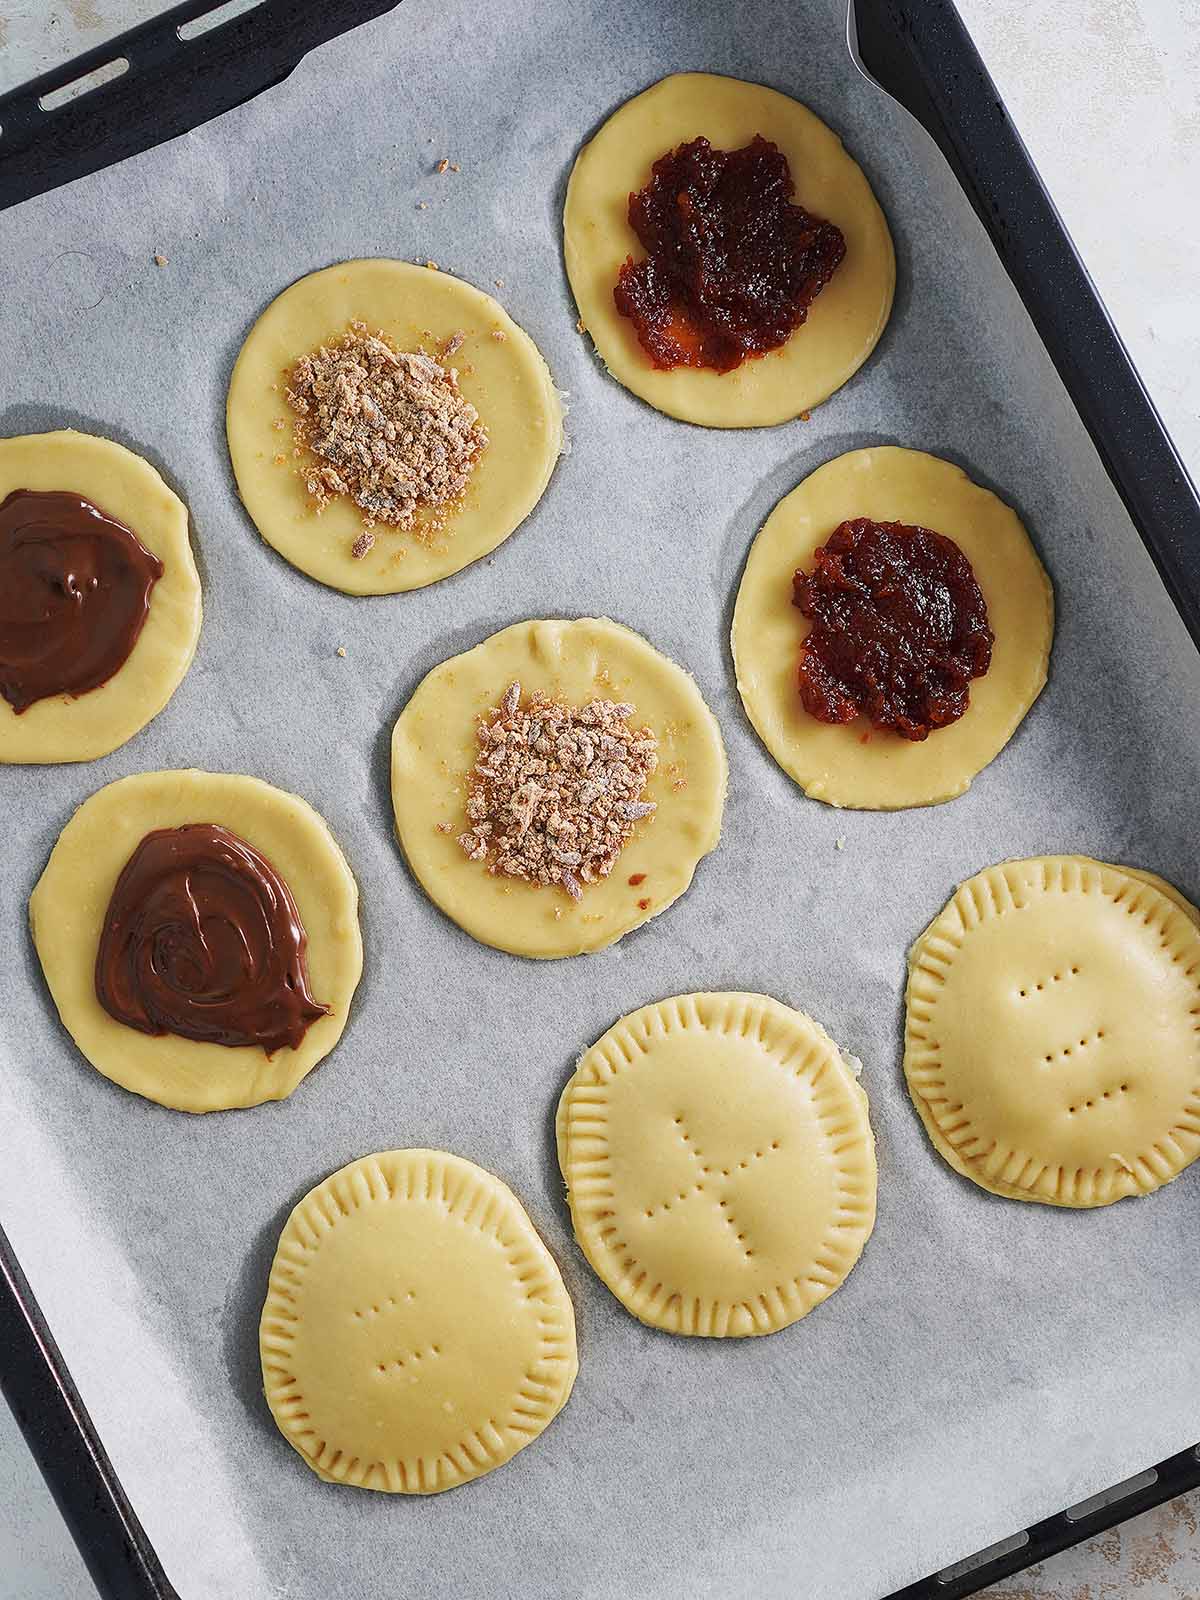
- Here comes the fun part now that you have the disks ready! Spoon about 2 tablespoons of the prepared piloncillo or your preferred filling into the center of the dough circle. Add the top dough to cover the filling. To seal the dough, crimp the edges of the crust together with a fork, leaving little fork lines in the dough. Then poke the top with a fork to create small holes.
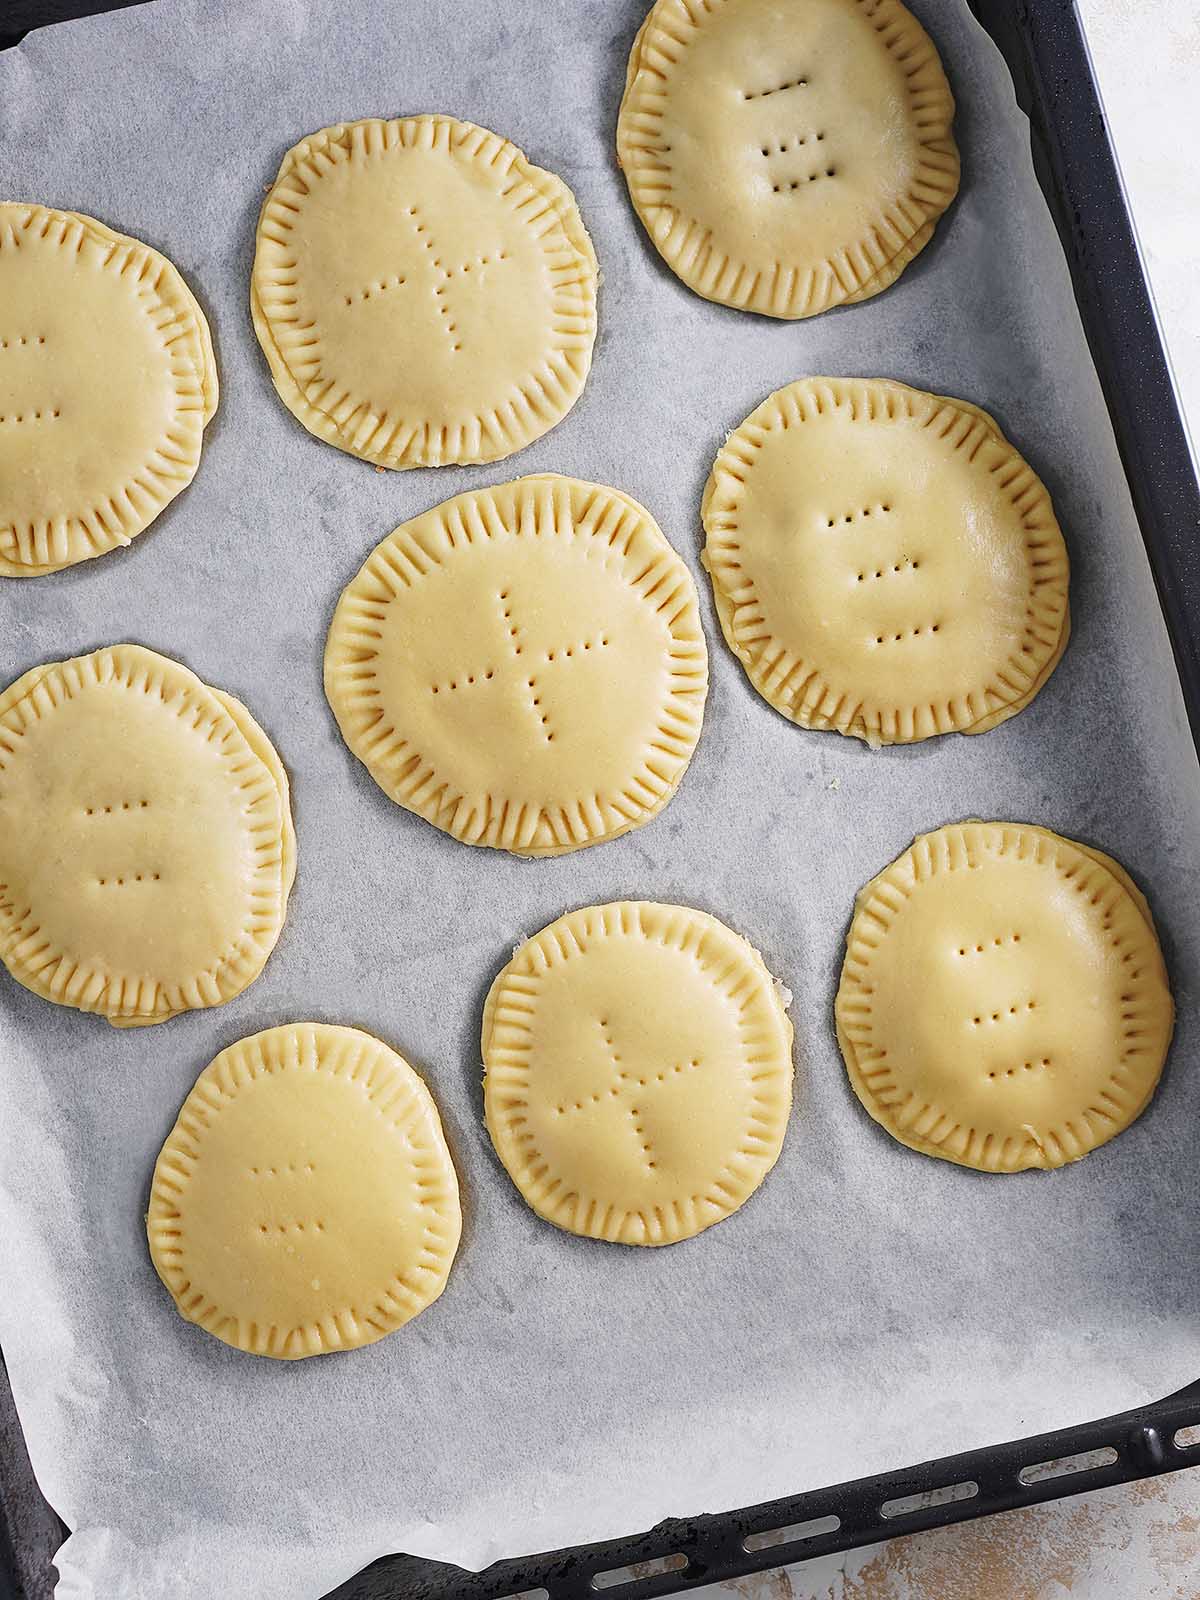
- In a small bowl, lightly whisk an egg with one tablespoon of water until it’s all combined. Using a pastry brush, brush the top of the coyota with the egg mixture, making sure it’s coated but not dripping.
In fact, they’re like an unfolded empanada. The original method is to bake them over a firewood (a traditional Mexican cooking method), giving them a unique flavor. For now, we’re just going to bake them in the oven.
- Bake for 20-25 minutes or until the edges are golden brown.
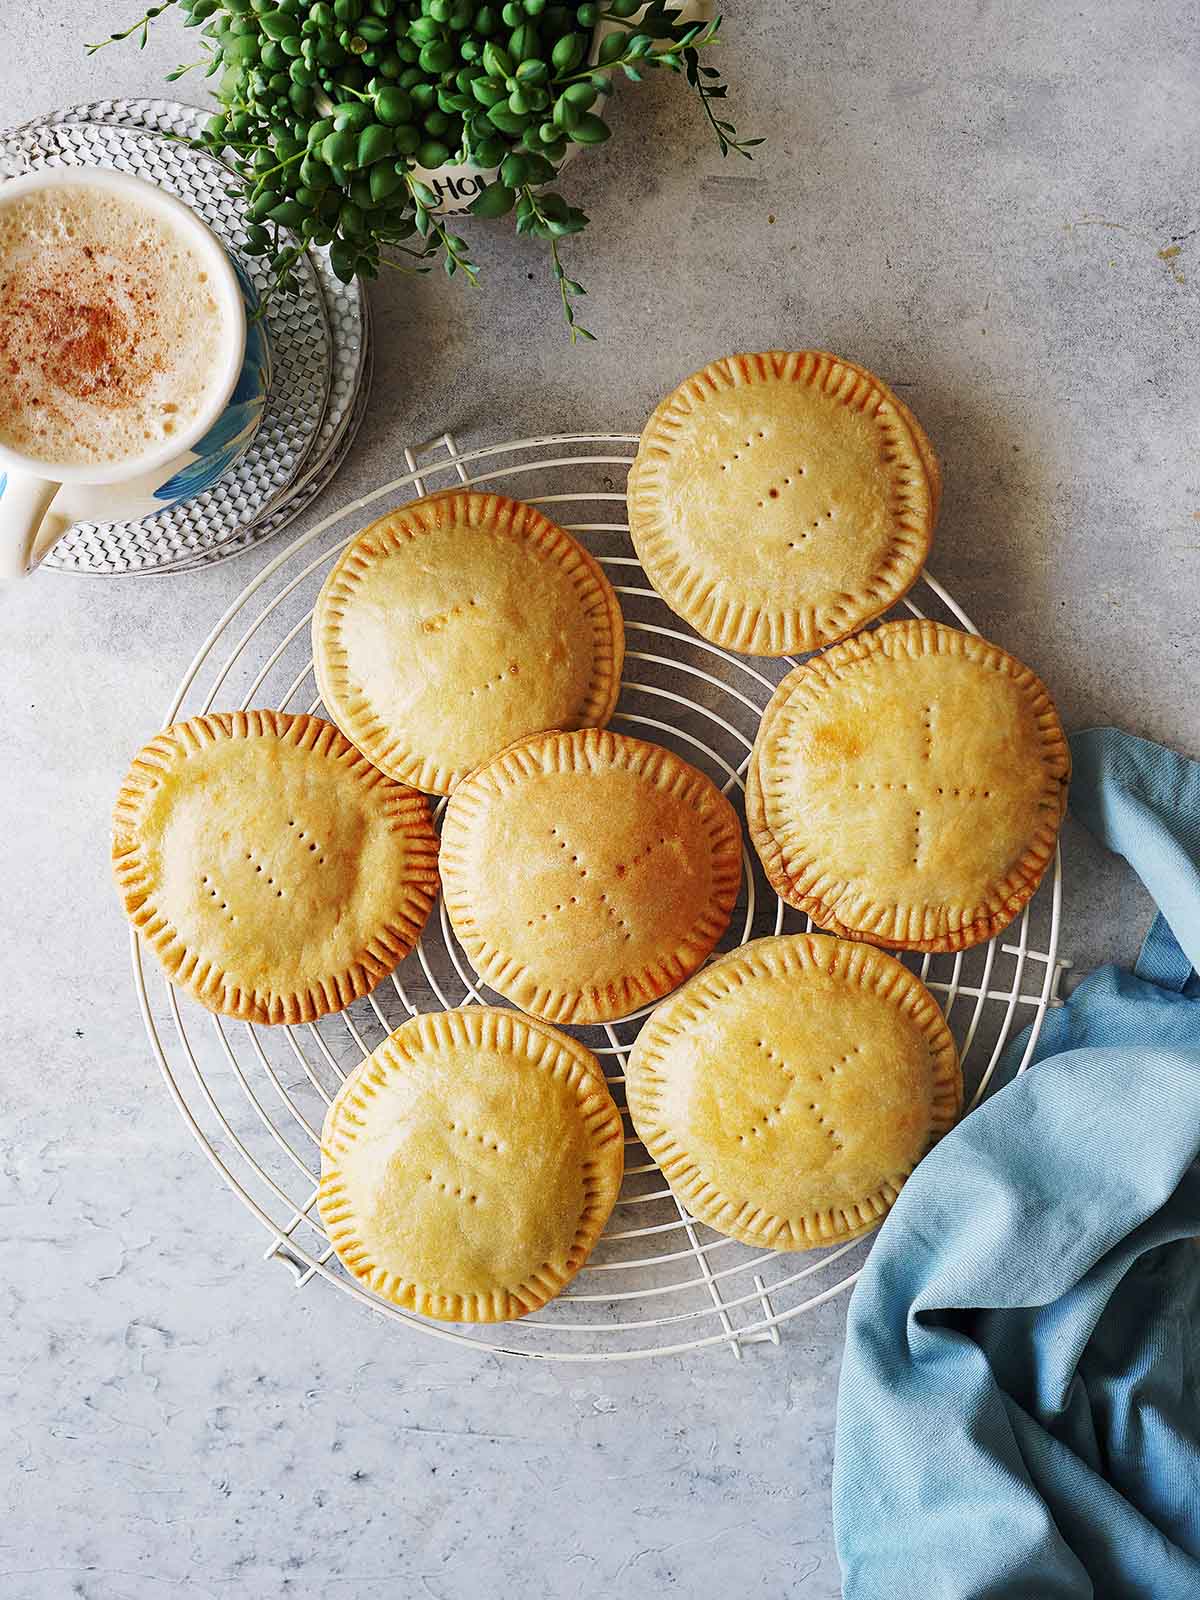
- Let them cool on the baking tray for 10 minutes then transfer to a cooling rack.
Tips and Notes
- Make mini coyotas for little treats.
- My prefer method is to use a corn tortilla press to form the disks. It is better than rolling the dough out and using a cookie cutter. It’ll save you time from kneading the leftover dough and having to rest it again prior to rolling it out again.
Serving Suggestions
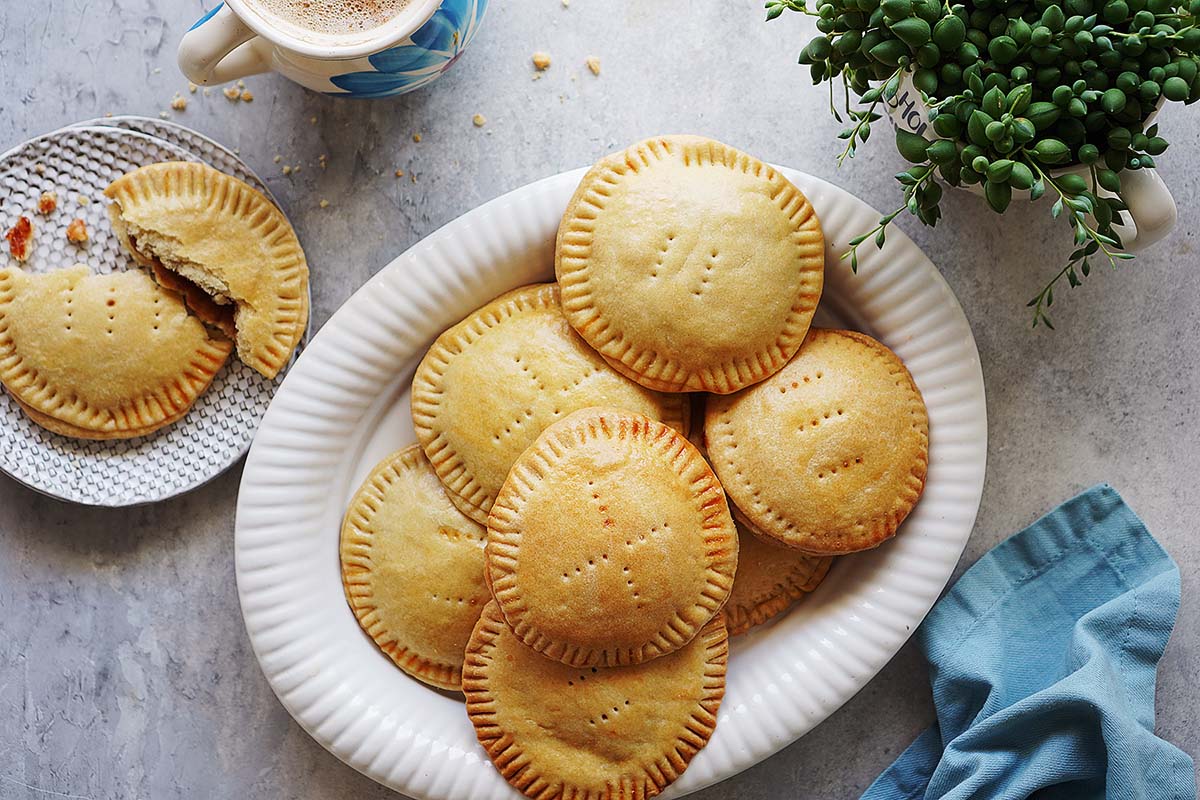
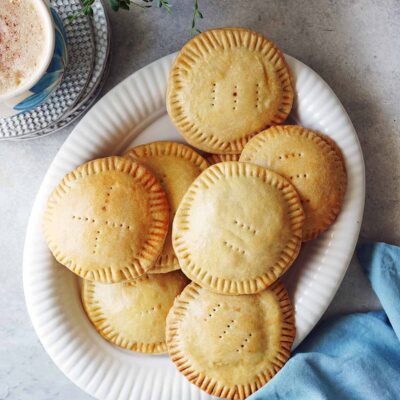
These sweet, flaky and tasty pastries can be served anytime and anywhere, thanks to their convenient portability. The aroma of piloncillo is irresistible! When you bite into it, they just melt in your mouth.
Coyotas make for a perfect companion to your morning or afternoon coffee. It goes perfect with Cafe De Olla, an Atole or a Mexican Hot Chocolate when it’s cold outside…. or hot! (I love hot drinks during hot weather! Do you?).
They’re also perfect to take them out on a picnic, chilling at the beach, bring them to a potluck or just give them as gifts!
How to Store
- Room temperature or fridge: Store in an airtight container or resealable plastic bag. This will help prevent moisture from sneaking in and zapping away that sought-after flakiness.
- Freezer: Freeze in a freezer-safe bag. Don’t forget to squeeze out as much air as possible before sealing the bag – air is the enemy of freezer freshness.
- When you’re ready to eat your frozen coyotas, let them thaw in the fridge for a few hours or even overnight.

MORE delicious…
Mexican Desserts
I hope you like this recipe! Share it, or leave a rating and comment below. For questions that need an answer right away, please contact me and I’ll get back to you asap. Gracias!!!! xx, Ana
Print Recipe:
Coyotas De Sonora
Ingredients
- 1 ¼ cup vegetable shortening or margarine (250g)
- ¼ cup brown sugar
- ¼ teaspoon table salt
- 4 cups all purpose flour (500g)
- ½ can beer (167 ml) - (make sure it's not light)
Filling
- 2 piloncillo cones - If you're using other filling, use 1 cone, mixed with 2 tablespoons of flour.
- ¼ cup all purpose flour
- Other fillings: Cajeta, Dulce de Leche, Quince paste (Dulce de membrillo), Nutella, etc. - Optional
- 1 egg (to make egg wash)
Instructions
- Start by prepping the piloncillo and other fillings. Unwrap the piloncillo and grate it to break it into little chunks. Note: If the piloncillo is too hard, warm it up in the microwave for about 10 seconds to soften it up.
- Mix it with the flour and set aside.
- In a large bowl, cream the vegetable shortening or margarine with an electric mixer or by hand. When it starts to get soft, add the sugar and salt and continue mixing for about a minute.
- Add the flour and mix until the mixture resembles coarse crumbs. Add the beer to the mixture while continuously kneading the dough until it becomes smooth and elastic.
- Transfer the dough onto a clean surface and knead it gently for a minute until it becomes smooth and cohesive.
- Shape the dough into into small balls (about 40 grams, the size of a golf ball), place on a plate and wrap in plastic wrap, and let rest for 20 to 30 minutes.
- Preheat oven at 350 F or 180 C. and line a baking sheet with parchment paper.
Making the disks
- With tortilla press: Place the dough ball between two pieces of plastic in a tortilla press (I use a ziplock bag, with the sides cut open) Then gently press the dough ball until it forms a 4-6 inch disk. Repeat until all balls are pressed.
- Rolling dough by hand: Divide into 4 equal portions. Roll out dough onto lightly floured surface to about ¼ to ⅛ -inch thickness. Using a cookie cutter or a cup, cut out circles of dough about 4-6 inches in diameter. Gently lay the disks onto the prepared baking sheets.
Assembling & Baking
- Spoon about 2 tablespoons of the prepared piloncillo or your preferred filling into the center of the dough circle. Add another disk on top to cover the filling. To seal the dough, crimp the edges of the crust together with a fork, leaving little fork lines in the dough. Then poke the top with a fork to create small holes.
- In a small bowl, lightly whisk the egg with one tablespoon of water until it's all combined.
- Brush the top of the coyota with the egg mixture, making sure it's coated but not dripping.
- Bake for 20-25 minutes or until the edges are golden brown. Let them cool on the baking tray for 10 minutes then transfer to a cooling rack.
Notes
- Room temperature or fridge: Store in an airtight container or resealable plastic bag. This will help prevent moisture from sneaking in and zapping away that sought-after flakiness.
- Freezer: Freeze in a freezer-safe bag. Don’t forget to squeeze out as much air as possible before sealing the bag – air is the enemy of freezer freshness.
- When you’re ready to eat your frozen coyotas, let them thaw in the fridge for a few hours or even overnight.
Your Private Notes
Nutrition
History
It is the dessert that Mexico learned to love due to the simple ingredients and popular ingenuity. A recipe created by Mrs. María Ochoa González, a native of Hermosillo, Sonora and who we thank for making coyotas popular, not only in Mexico, but also in the United States.
The name coyotas is literally translated to a female coyote, but it is also a Sonoran colloquial term for mestizo women of mixed Indian and Spanish heritage. The children were called “coyotitos or coyotitas”
So why is this dessert called Coyotas?
In the 50s, a woman named Agustina Araiza lived in Villa de Seris, a town near Hermosillo, Sonora. She invented this wood-fired baked dessert. One day, Doña Agustina shared her recipe with her comadre María Ochoa González, who spread the taste of this dessert, becoming a well-known pastry chef in Hermosillo.
Later on, these pastries were made by home bakers and when their daughters went out to sell them, people yelled at them “the coyota is coming”, thus creating the name “coyotas”.
I’ve never had anything like this, but they sound marvelous. Looking forward to trying these.
This was such a unique and unexpected recipe that does not disappoint! Quick, easy and delicious; the best cure for my sweet tooth, indeed!
Transport your taste buds to the vibrant flavors of Sonora with these Coyotas! This traditional recipe brings the heart and soul of Sonoran cuisine straight to your kitchen.
These were such fun little treats to make! They really did remind me of the dessert hand pies from my childhood. Yum!
These coyotas de sonora were SO tasty!! Made some with a dulce de leche filling and others with nutella, both options were delicious.