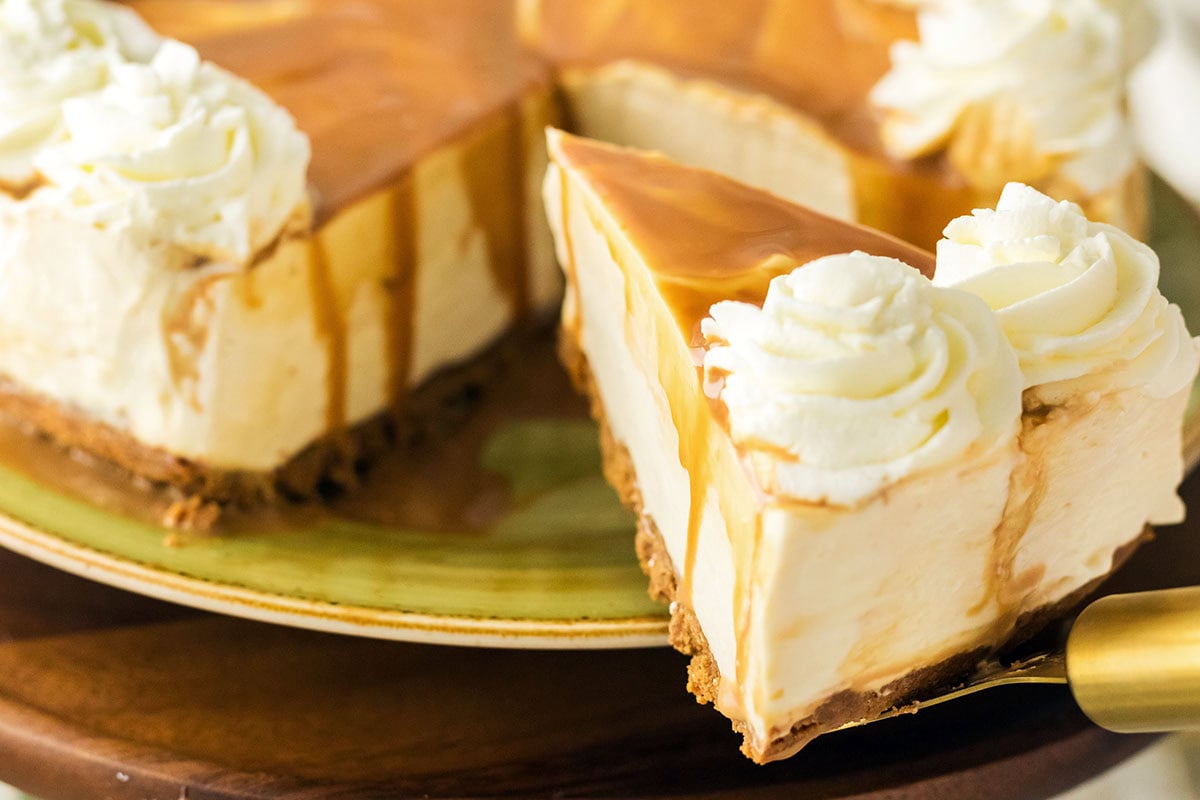
Dulce de Leche Cheesecake ❤️ No-bake, super creamy, and built on a buttery Biscoff crust. That caramel swirl on top is everything. Make this one for your next gathering, it’ll disappears fast!

🗒️ In This Post
All the sweetness with no fuss!
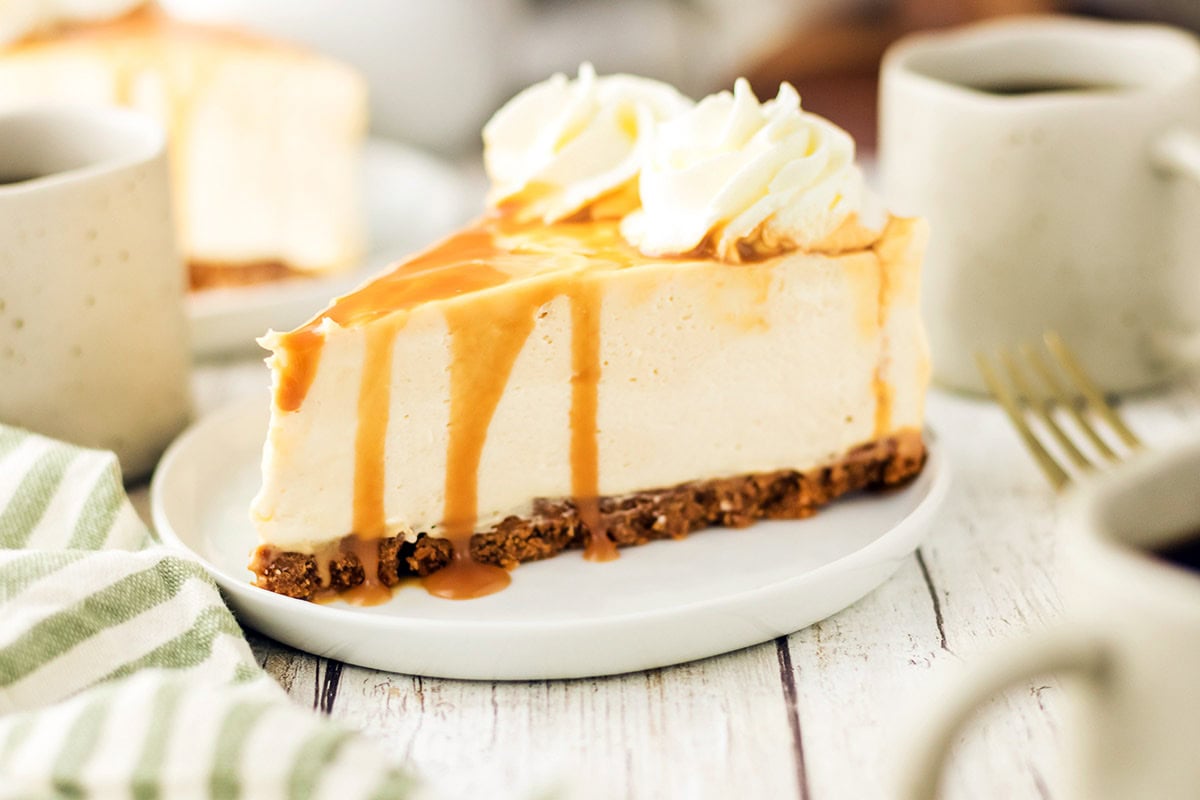
I love any kind of cheesecake but sometimes I don’t feel like doing the water bath kind so this one is perfect for that! It’s completely no-bake, incredibly creamy, and has the perfect mix of caramel sweetness and crunchy cookie goodness. Every layer comes together in a few simple steps, and the whole thing chills into a soft, dreamy slice that disappears fast.
This cheesecake starts with a Biscoff crust that brings gentle spice and a buttery snap, creating a firm base for the creamy filling. The center is a smooth blend of cream cheese, powdered sugar, and dulce de leche, whipped until it’s completely velvety, then lightened with a fold of whipped topping so the texture lands somewhere between mousse and cheesecake.
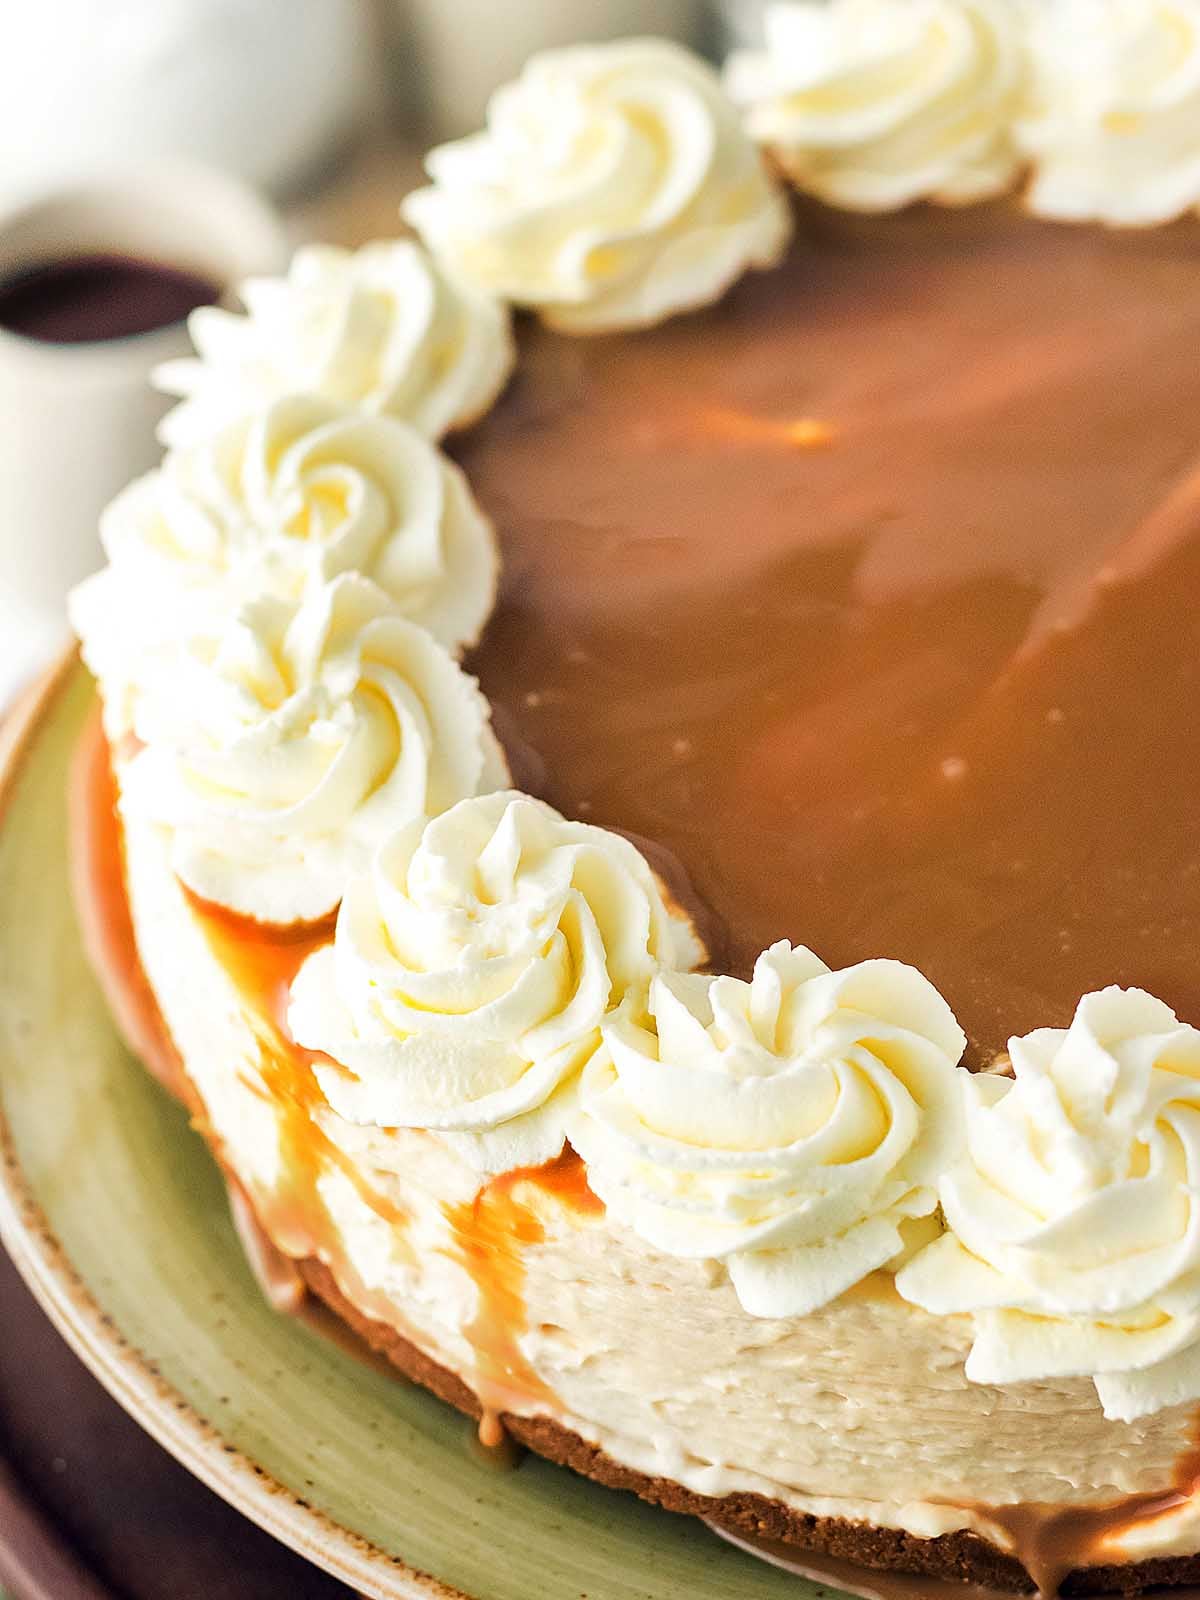
Once chilled, each slice holds its shape beautifully and takes on even more caramel richness when you spoon dulce de leche over the top and add soft clouds of whipped cream.up in juice bars, stadiums, and corner stands.

🩷 xoxo, Ana
How To Make Dulce De Leche Cheesecake
**You’ll find the complete recipe and ingredient list in the card at the end.**
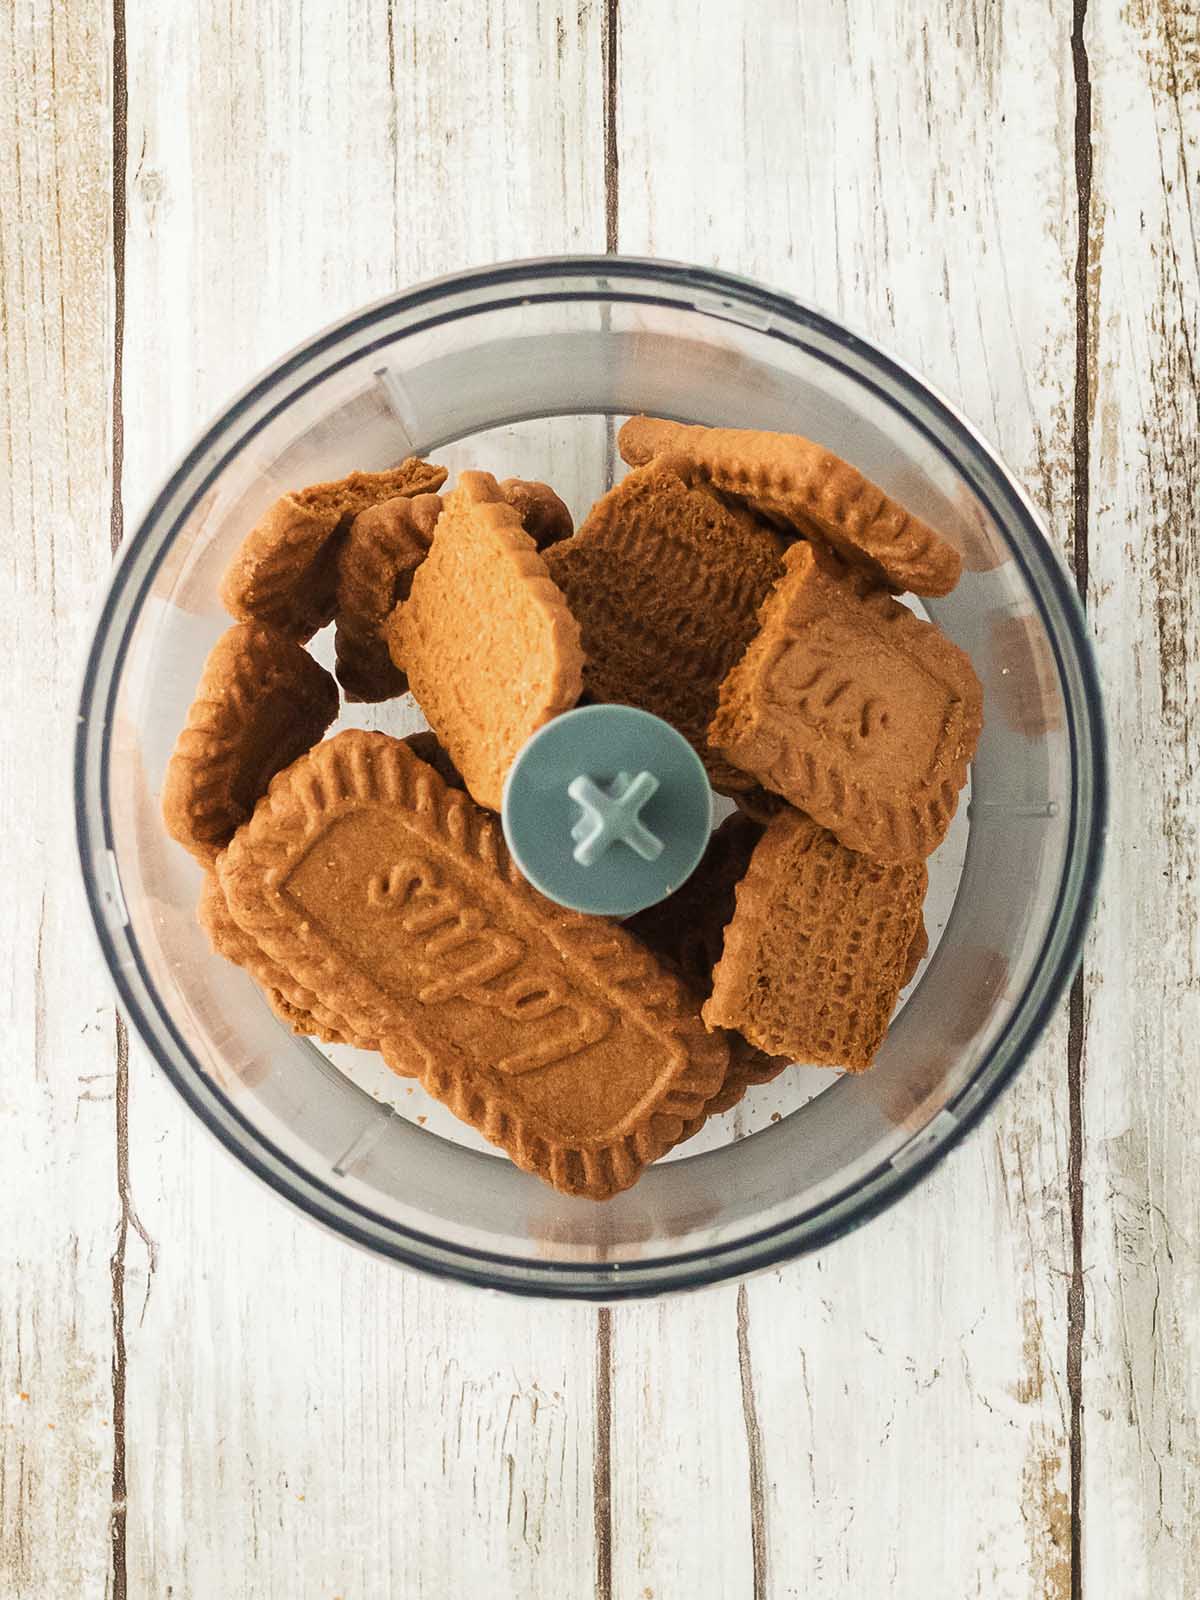
1. Crush the cookies. Pulse the Biscoff until they look like sand. No big chunks, you want them fine so the crust stays tight.
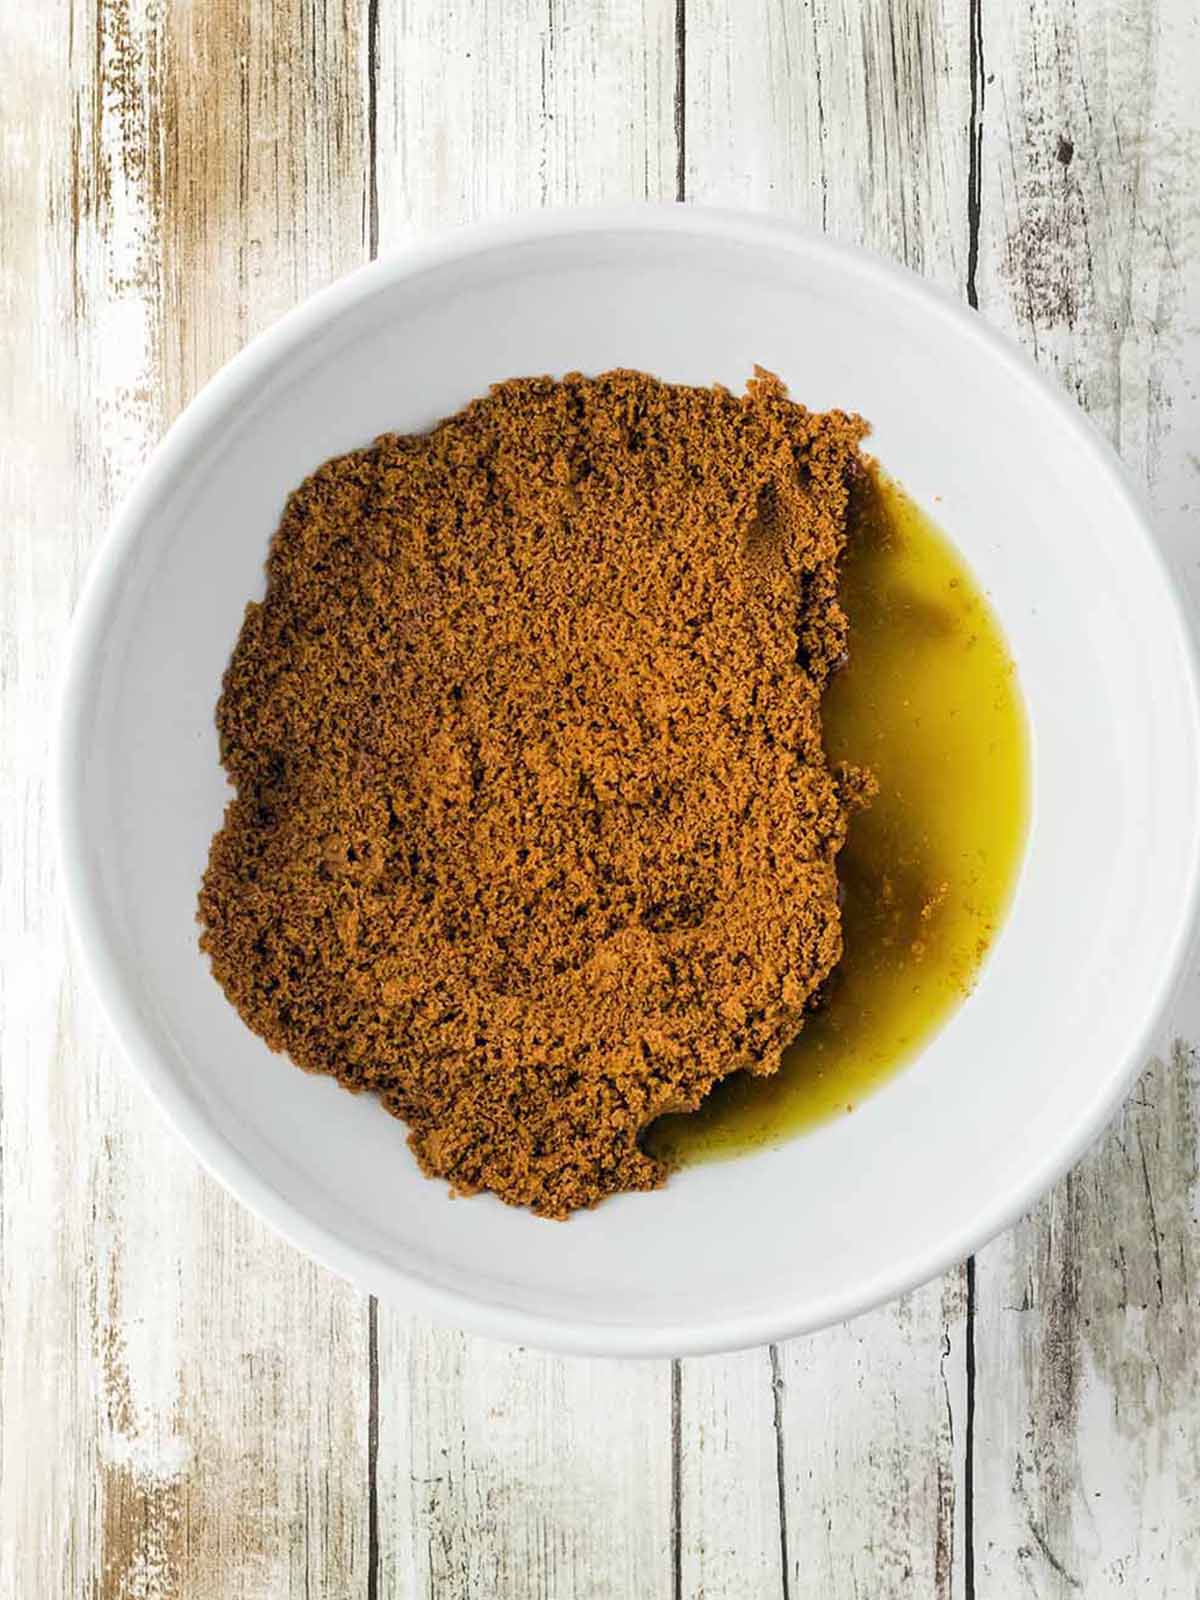
2. Mix with the melted butter. Transfer the crumbs to a medium mixing bowl and add the melted butter. Stir the two together until your crumbs are like wet sand. If you press some crumbs between your fingers, it should stick together.
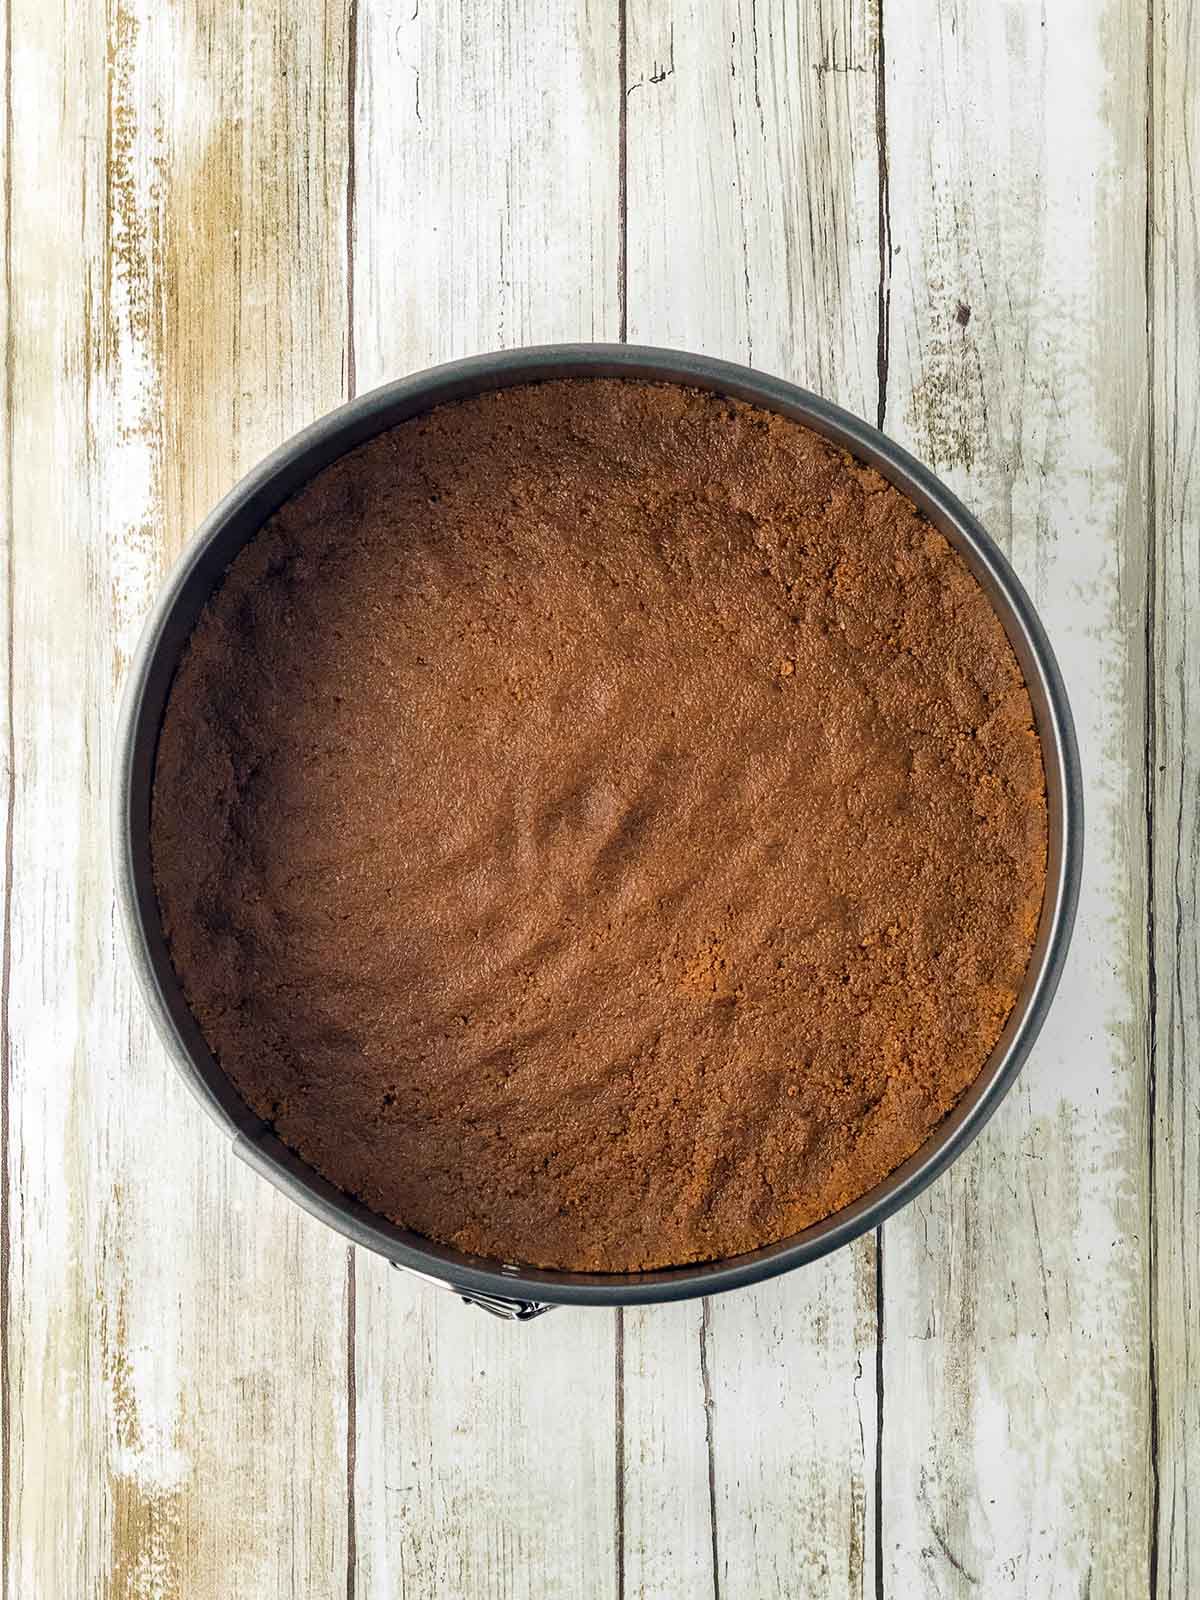
3. Press into the pan. Press the Biscoff mixture into the bottom of your springform pan. Press firmly! You can use a flat bottomed glass but I always find my fingertips work better. Place the crust in the fridge to chill while you make the filling.
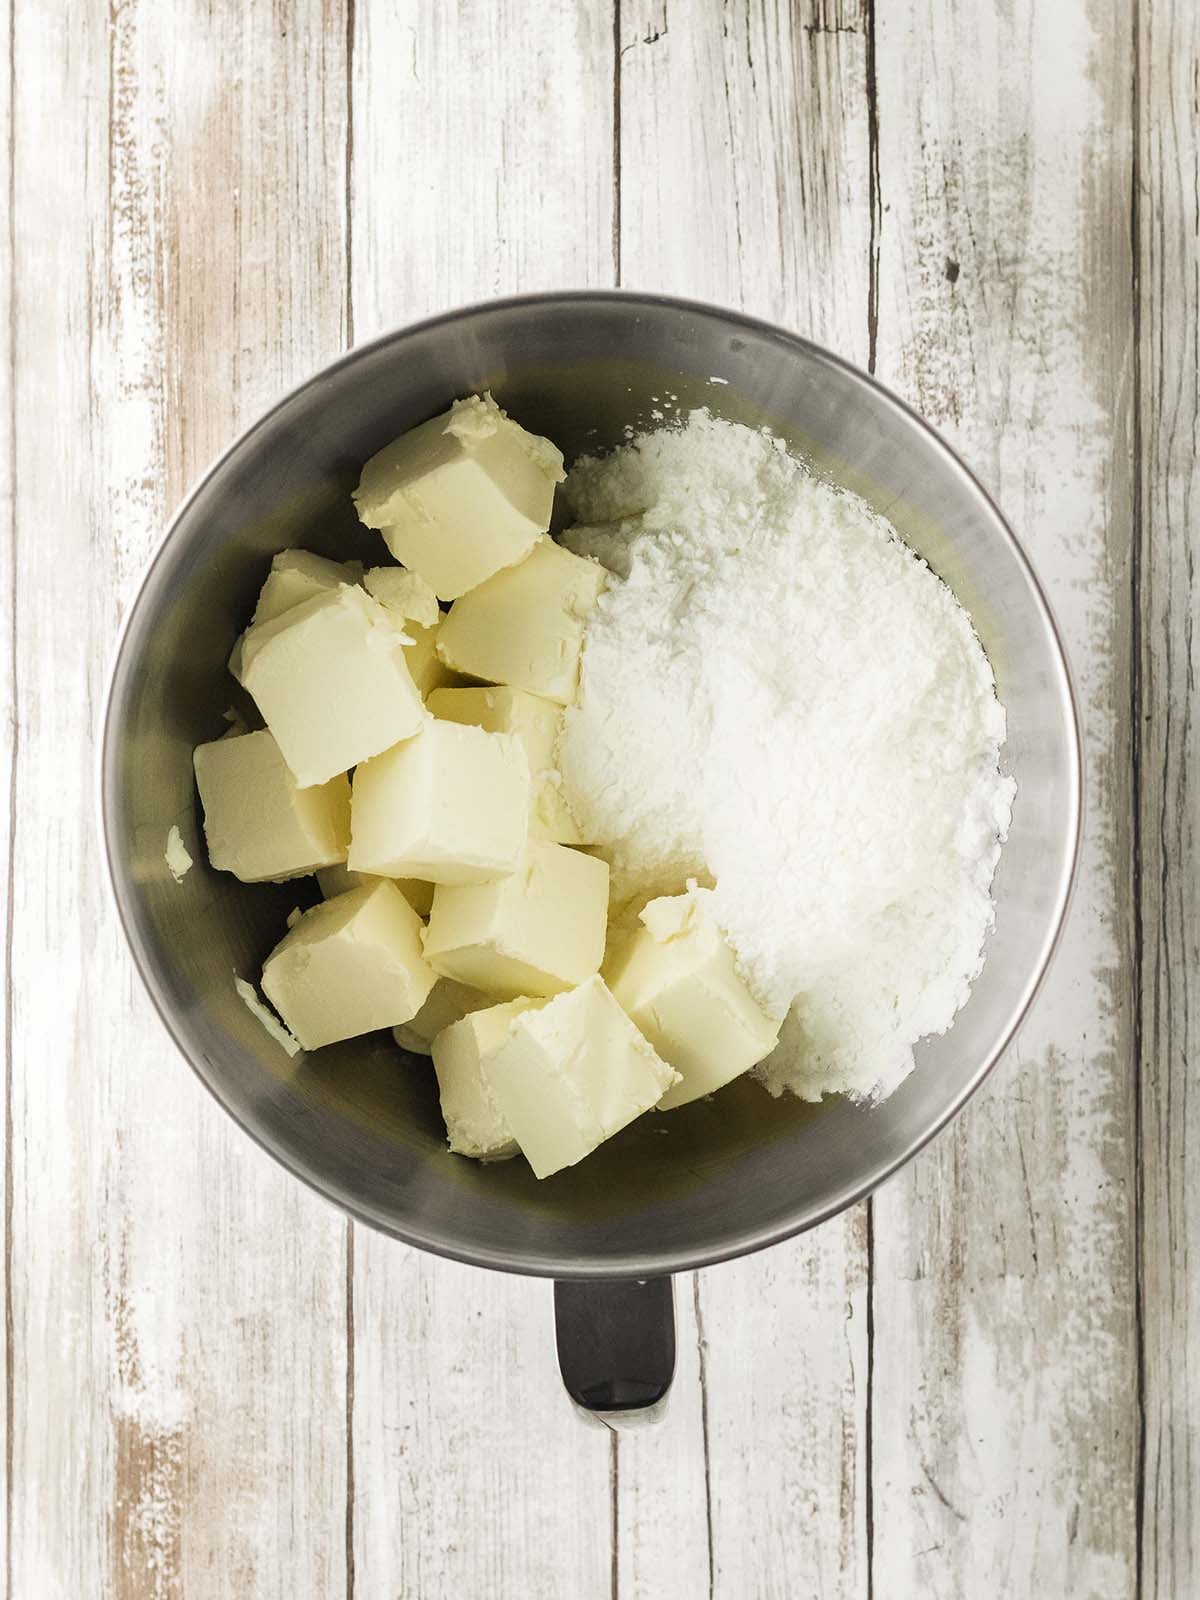
4. Beat the cream cheese + powdered sugar.
You want this completely smooth, so let the mixer run a few minutes until there are no lumps.
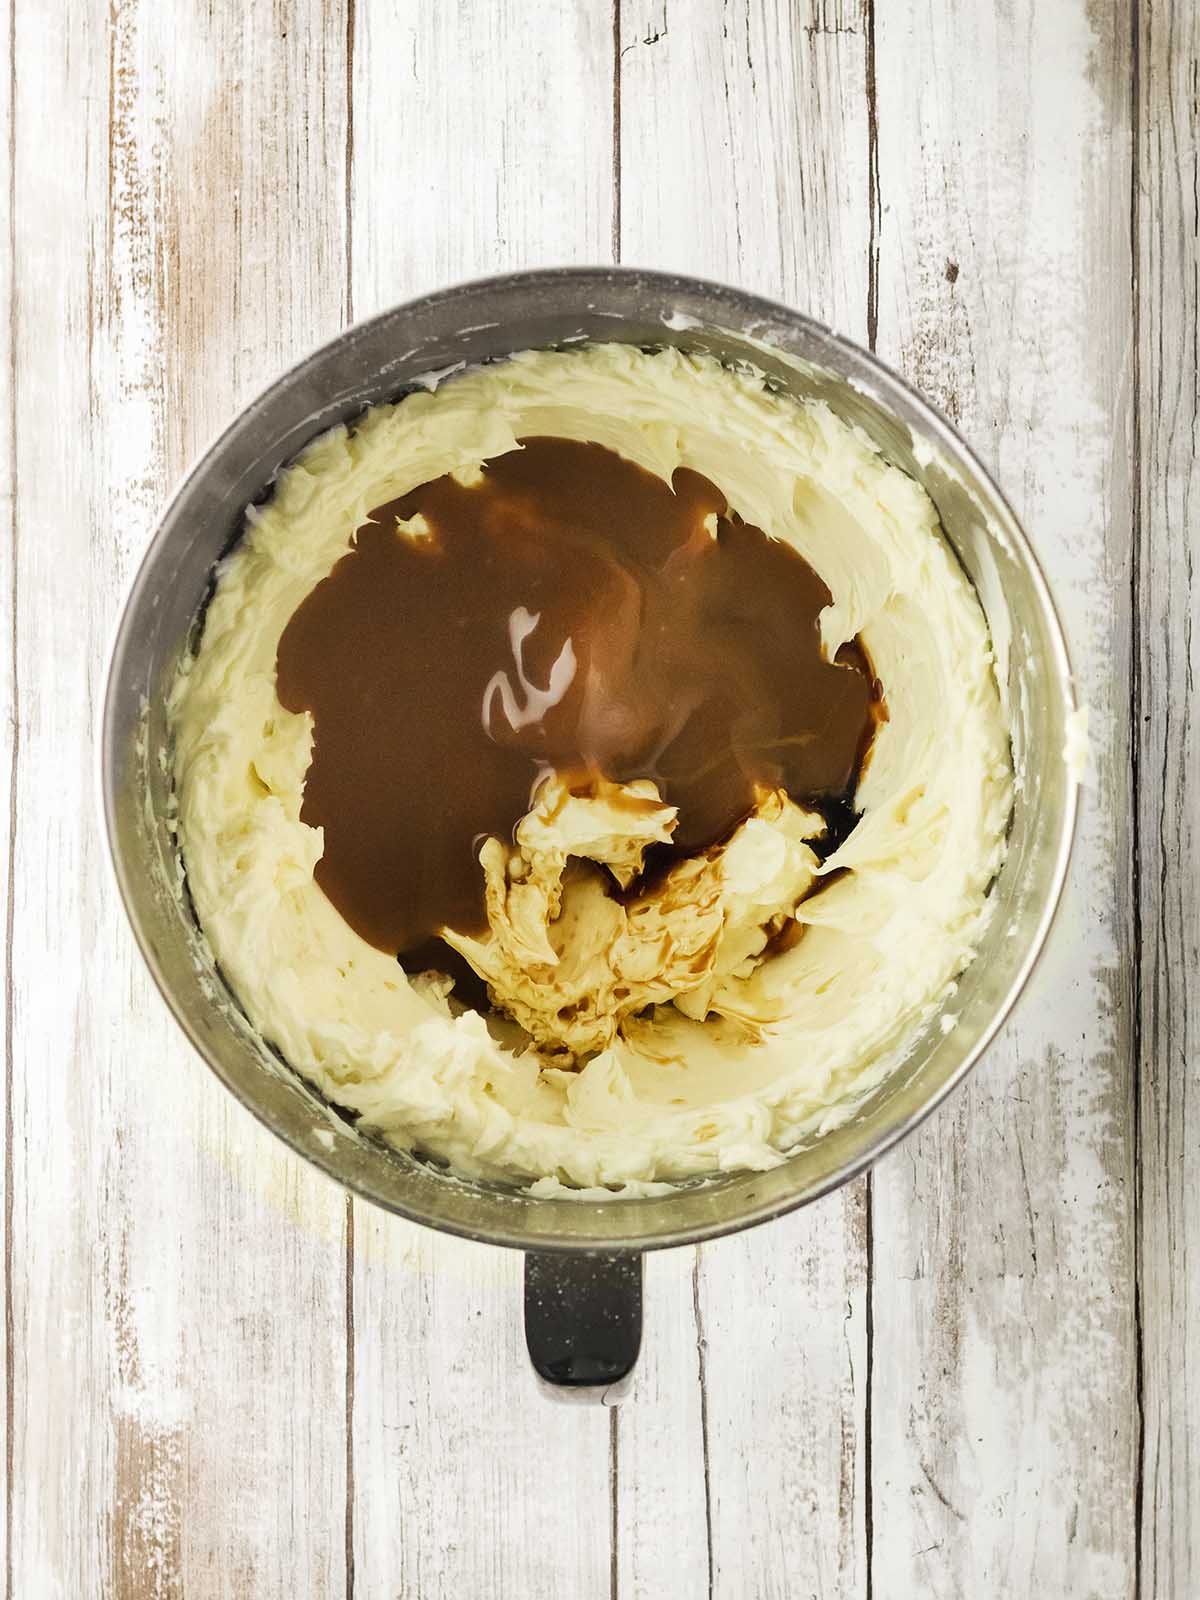
5. Add the dulce de leche + vanilla. It’ll turn into a silky caramel base once it’s whipped in.
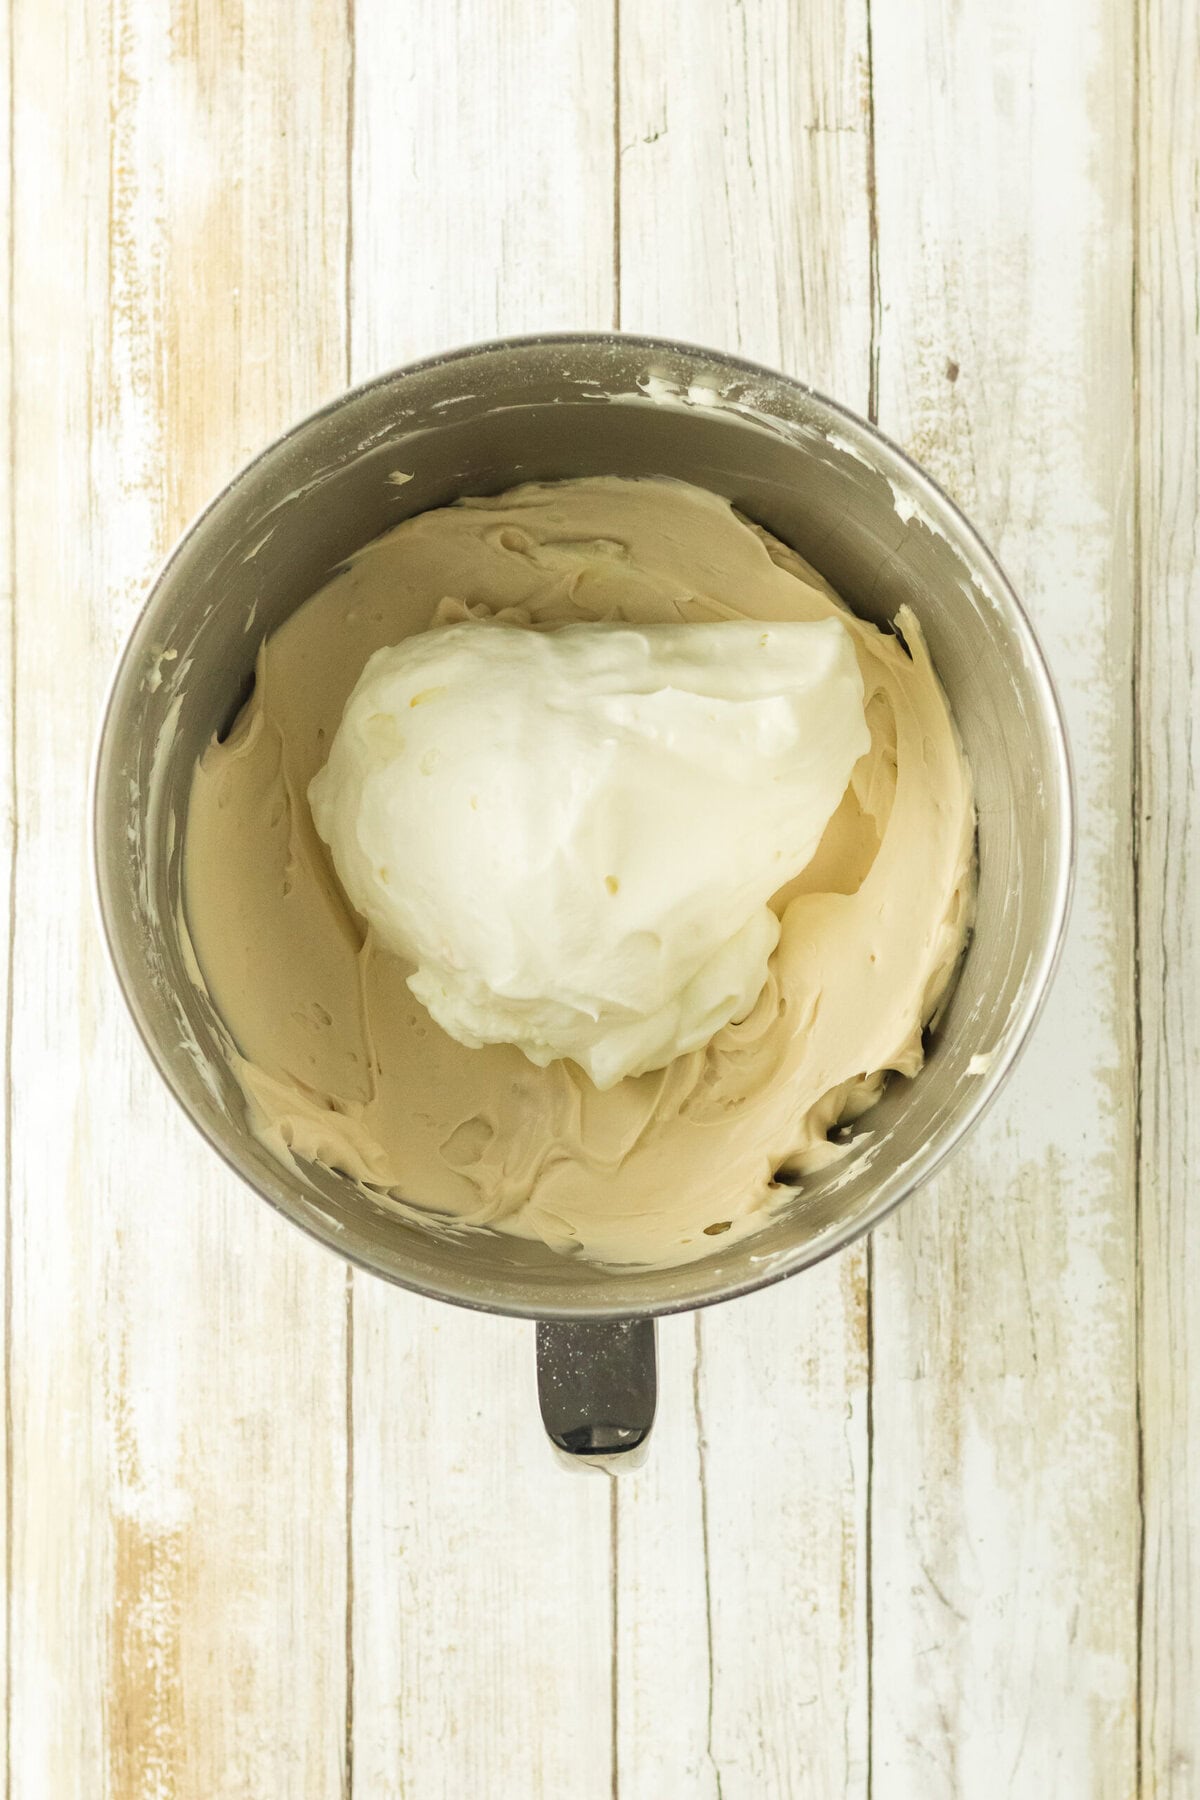
6. Fold in the whipped topping. Use a spatula and be gentle, this keeps the cheesecake light and airy instead of dense.
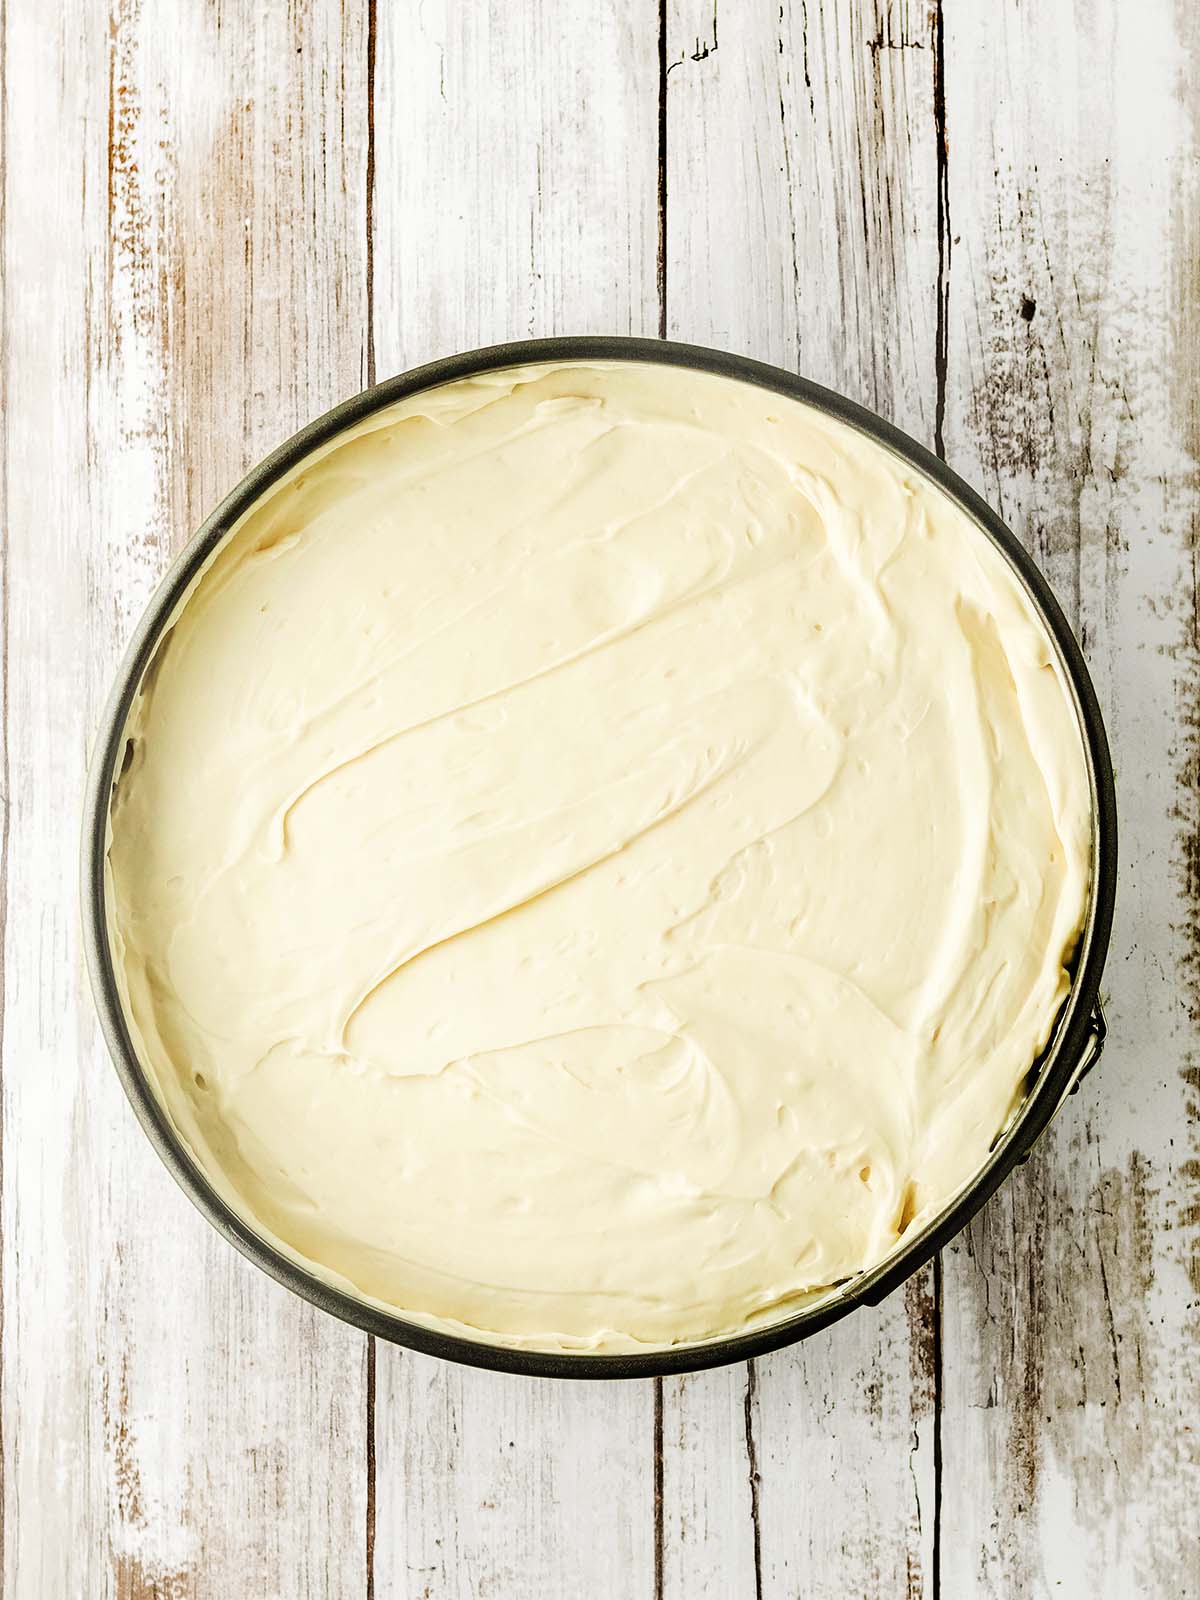
7. Fill the crust. Spread the mixture over the chilled crust and smooth out the top.
8. Chill. Let the cheesecake firm up in the fridge for at least 4 hours. Overnight is even better if you have the time.
9. Release from the pan + decorate.
A quick run of a knife around the edge helps it come out cleanly. Add your drizzle of dulce de leche and a few soft swirls of whipped cream.
Ana’s Recipe Tips
- Use room-temperature cream cheese. It blends smoother and prevents lumps.
- Don’t skip chilling the crust. It helps the butter firm up so the base stays sturdy.
- Homemade whipped cream won’t hold as well in a no-bake cheesecake, the stabilized store-bought kind gives you the best texture.
- Use your food processor to crush the Biscoff cookies into fine crumbs. It should only take a few minutes.
- When pulsing the Biscoff cookies in your food processor, you want the crumbs to be very fine. A few larger crumbs can make the crust a little crumbly.
- If the dulce de leche is too firm, you can warm it slightly, about 15 seconds in the microwave to help it flow and whip up better.
- For nice, clean slices, I would suggest warming the knife before slicing. Run your knife under hot water for a few minutes. Wipe the water off the knife then slice cleanly. Wipe the knife off between slices.
More Mexican Desserts
Print Recipe:
Dulce De Leche Cheesecake (No Bake)
Equipment
- 9” springform pan
- medium mixing bowl
- stand mixer with whisk attachment
Ingredients
For the Crust
- 9 ounce (250g) Biscoff cookies (one standard size package)
- ½ cup (4oz, 115g) unsalted butter, melted
For the Filling:
- 24 ounce (680g) cream cheese (3 bricks)
- 1 cup powdered sugar
- ¾ cup (13oz, 368g) dulce de leche sauce
- 1 teaspoon vanilla extract
- 8 ounce (227g) whipped topping
For the Topping and Garnish:
- 4 Tablespoons dulce de leche
- whipped topping
Instructions
- Use your food processor to crush the Biscoff cookies into fine crumbs. It should only take a few minutes.9 ounce (250g) Biscoff cookies (one standard size package)
- Transfer the crumbs to a medium mixing bowl and add the melted butter. Stir the two together until your crumbs are like wet sand. If you press some crumbs between your fingers, it should stick together.½ cup (4oz, 115g) unsalted butter, melted
- Press the Biscoff mixture into the bottom of your springform pan. Press firmly! You can use a flat bottomed glass but I always find my fingertips work better. Place the crust in the fridge to chill while you make the filling.
- In the bowl to your stand mixer, use the whisk attachment to beat the cream cheese and powdered sugar together until smooth. About 3 minutes.24 ounce (680g) cream cheese (3 bricks), 1 cup powdered sugar
- Add the dulce de leche and the vanilla extract and beat on high until mixed in. Add the whipped topping and use a spatula to fold them together.¾ cup (13oz, 368g) dulce de leche sauce, 1 teaspoon vanilla extract, 8 ounce (227g) whipped topping
- Spoon the cheesecake filling over the chilled crust and use a spatula or the back of a spoon to smooth it out evenly. Pop the cheesecake in the fridge to chill for 4 hours but up to overnight.
- Once the cheesecake has finished chilling, remove it from the fridge and run a knife around the outside edge of the cake. This will help in removing it from the pan. Transfer the cheesecake to a serving plate. Top with 3-4 tablespoons of dulce de leche and whipped cream. Serve immediately.4 Tablespoons dulce de leche, whipped topping
Notes
Storing Suggestions
- Fridge: Keep covered and refrigerated for up to 5 days.
- Freezer: Freeze (undecorated) for up to 2 months. Wrap tightly to avoid ice crystals.
- Leftovers: Add fresh whipped topping right before serving — it softens quickly in the fridge.
Your Private Notes
Nutrition
Recipe FAQs
Yes, the texture works, but the flavor will be milder. Biscoff adds that warm spiced cookie layer that pairs so well with caramel.
It does! Freeze the whole cheesecake (without the whipped topping) for up to 2 months. Thaw overnight in the fridge.
Run a thin knife around the edge before releasing the springform. It gives you clean sides every time.
⭐️ I love to hear from readers and always do my best to respond to each and every comment. If you make this recipe be sure to leave a comment and/or give it a rating! Don’t forget to subscribe for all the latest updates!
This cheesecake is absolutely stunning! It’s such a beautiful upgrade to a classic dessert. I can’t wait to try this for my next special occasion!
So darn good that my family requested this for Christmas!
This cheesecake is unbelievably creamy and that Biscoff crust with the dulce de leche is pure heaven. Do you prefer swirling extra caramel into the filling or keeping all of it on top for serving?
I love the sweet, tangy flavor with the kick of caramel. It’s so easy, too, which I love.
This was awesome! I never make cheesecake because I always ruin it. This no-bake cheesecake was great!
I hope you like this recipe! Do you have any questions I can help you with? Or if you made it, I would love it if you leave a comment or rating below. ⭐️
Gracias!!!! xx, Ana